The Art of Landscape Design: What to Look for in a Professional Landscape Designer

Close your eyes and imagine going out onto your beautifully designed patio , surrounded by many green plants and colorful flowers. You can hear birds singing and leaves moving in the wind. It feels like you're in a peaceful place in your backyard.


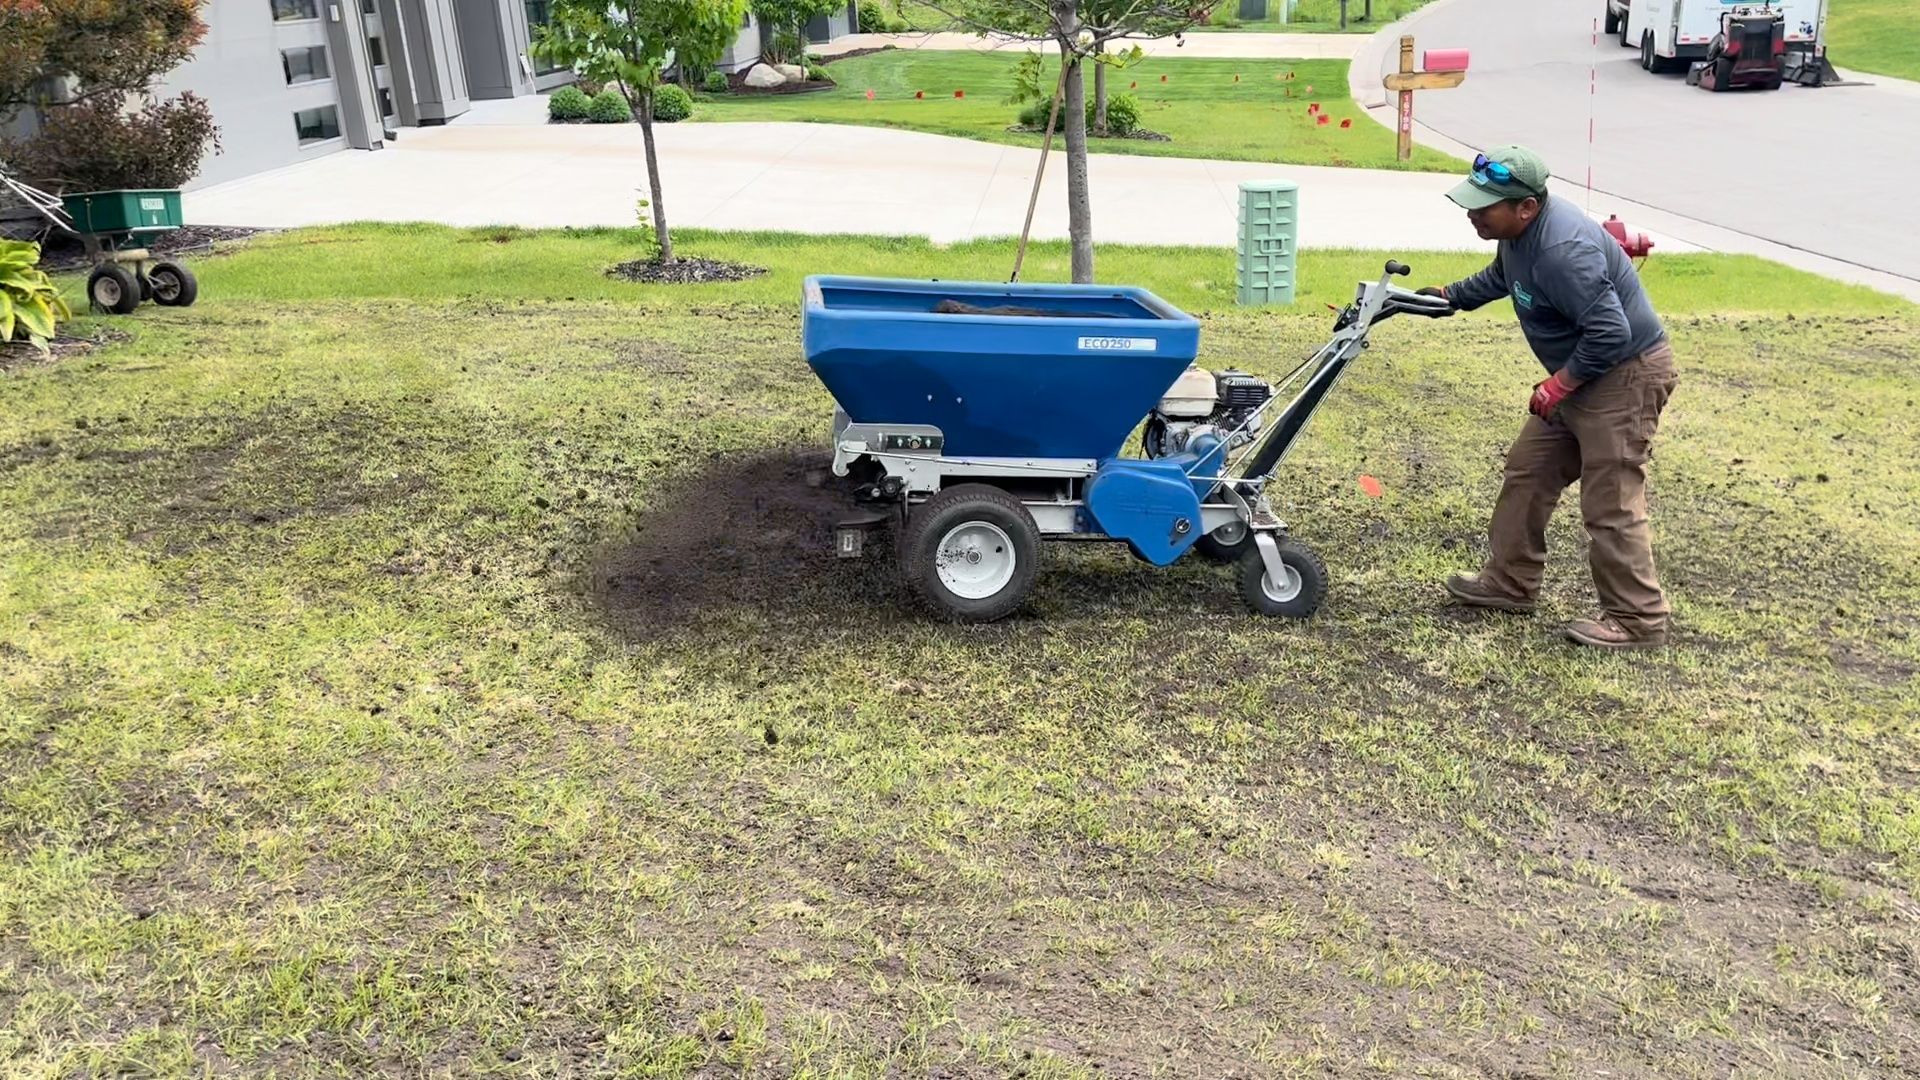
Creating this picturesque scene requires the expertise and vision of a professional landscape designer . It doesn't matter if your garden is small or big. A good designer can change your outdoor area into a place that suits you and shows who you are.


But how do you find
professional landscape designers  who can make your dreams a reality? This article will talk about why hiring a skilled landscape designer is important and give you tips on how to find one. So, get ready to learn the secrets of amazing outdoor landscapes!

Qualities of a Skilled Landscape Designer

✔️ Creativity

A great landscape designer is like an artist. They can turn your outdoor area into a colorful and attractive space that showcases your style. 


Their creativity helps them create unique designs, blend different elements well, and add new and interesting features to the landscape.

✔️ Accuracy

Accuracy is really important for a good landscape designer. They're cautious and pay close attention to every part of the project.


Skilled designers are precise in everything they do. Whether it's
choosing the right plants , figuring out the best spots for paths or lights, or making sure perfect measurements for outdoor structures.

✔️ Attention to Detail

A good landscape designer knows that even small things matter. They consider things like the kind of soil you have, how much sun your yard gets, and where water will go when it rains. 


By thinking about these details, they can make a design that looks great and works well.

✔️ Bringing Your Ideas to Life

A great landscape designer can turn your imagination into a real plan. They listen carefully to what you want and need, and then they find ways to include those things in the design. 


They also use their knowledge and experience to suggest improvements and solve problems, all while making sure you're happy with the result.

What to Look for When Hiring a Landscape Designer

Choosing the right landscape designer is super important for getting the outdoor space you want. To make sure you choose well, think about these things:

⭐ Budget

First, figure out how much money you can spend on your landscape project. Knowing your budget helps you find a designer who can work with what you've got.

⭐ Portfolio

A good landscape designer will have examples of their previous projects. Look at these to see if you like their style and if they can create the outdoor space you're dreaming of.

⭐ Comments and Reviews

See if there are any comments from past clients about the designer. Positive feedback means they're probably good to work with.

⭐ Demands Met

Everyone's outdoor space needs are different. Whether you have specific ideas or special requirements, make sure the designer you pick can handle them. You want someone who can make your vision come to life.

Frequently Asked Questions

Why should I hire a professional landscape designer?

Hiring a professional landscape designer has many benefits. They know a lot about creating great outdoor spaces that fit your needs. They make sure everything works well, like the drainage and plants. Plus, they can save you time and money by avoiding mistakes and getting the job done right.

What should I look for when choosing a landscape designer?

When picking a landscape designer, check out their past work to see if you like their style. Make sure they understand what you want. It's also helpful to see what others say about their work. And, of course, think about your budget and make sure they can work within it without sacrificing quality.

Can a landscape designer work within my budget?

Yes, a professional landscape designer can work with what you can spend. Just tell them how much you have, and they'll find a way to make it work. They might suggest different options or materials to help you get what you want without spending too much.

What is the landscape design process?

The landscape design process has a few steps. It starts with a meeting to discuss what you want and how much you can spend. Then, the designer makes a plan with all the details, like where things will go and what plants to use. Once you agree on the plan, they start building it.

How long does the landscape design process take?

It depends on how big and complicated the project is. It could take a few weeks or a few months. The planning part might take a few weeks, and then building it could take longer, especially if the weather is bad. Talk to the designer to get an idea of how long it might take.

Hiring a professional landscape designer  is important if you want an outdoor space that matches your vision. They know a lot about how to make your landscape look great and work well.


When you're picking a landscape designer, consider your budget, look at their past work, and see what other people have said about them. That way, you can choose someone who fits your needs and wants.


Getting a professional landscape design is a way to make your life better. With their help, you can have an outdoor space that makes your home look even better and gives you a nice place to relax. 


So, why wait? The professionals at
KG Landscape  are ready to help you craft the home of your dreams. Contact us now and start making your outdoor space amazing!

Ready to Start on Your Next Project?

Call us at (763) 568-7251 or visit our quote page.

By Kent . November 13, 2025
Fix Your Neglected St. Louis Park Lawn You just bought a house in St. Louis Park with a lawn that's been neglected for years. More weeds than grass, bare patches everywhere, bumpy and uneven from lack of care. You're standing in your yard wondering if you can fix what's there or if you need to start completely over. The previous owners clearly gave up on it or didn't know what to do. Now it's your problem. You want a lawn your family can enjoy, but you don't know if that means overseeding what's there, tearing everything out and reseeding, or just sodding over the whole mess. Based on what we've assessed throughout St. Louis Park, most homeowners don't know how to evaluate their lawn's condition. They guess at solutions without understanding the problem. They try overseeding lawns that need complete renovation, or they consider expensive sodding when simpler approaches would work. We help you understand what's salvageable and what needs complete renovation so you're not wasting money on wrong approaches. Why Assessment Comes Before Action Most homeowners jump straight to solutions without understanding what they're dealing with. "I'll just throw some seed down and see what happens" rarely works on neglected lawns. Understanding your lawn's current condition determines which approach will actually succeed. Wrong approach wastes money and time. We've seen homeowners try overseeding lawns that were 80% weeds with almost no viable grass. They spent money on seed that never had a chance because there wasn't enough grass to build on and weeds immediately choked out the seedlings. We've also seen homeowners consider sodding entire lawns that could have been fixed with proper preparation and reseeding, spending thousands more than necessary. Proper assessment first, then appropriate solution. This saves money by doing the right thing once instead of trying wrong approaches repeatedly and eventually ending up at the solution you should have started with. What "Neglected" Actually Means: Levels of Lawn Damage Not all neglected lawns are equally bad. Understanding severity helps determine which approach makes sense for your specific situation. Mild neglect means you have 60-70% decent grass, just thin and weedy. Some bare spots exist but you've got mostly grass coverage. The grass is weak but alive. This lawn mostly needs thickening and weed control. Overseeding might work here. Moderate neglect shows 40-50% grass and 50-60% weeds. Substantial bare areas exist throughout the lawn. The grass that remains is weak and struggling. This lawn likely needs full reseeding, not just overseeding, to get back to functional condition. Severe neglect means 70% or more weeds with minimal viable grass remaining. Large bare areas or completely bare sections dominate. What little grass exists is dying or already dead. This lawn probably needs sodding or complete renovation with extensive preparation. Complete failure is essentially no grass remaining, just weeds and bare ground. Soil is compacted from years of neglect. Erosion damage is visible. This lawn needs more than just grass - it may need soil work, grading, and definitely requires sodding or major renovation. We assess St. Louis Park lawns on this spectrum constantly. Knowing where your lawn falls determines realistic approach and prevents wasting money on solutions that won't work for your condition. Walking Your Lawn: What We Look For During Assessment When we assess neglected lawns, we're looking at specific factors that determine what approaches will succeed. Grass coverage and viability matters most. How much actual grass exists versus weeds? Is the grass healthy or barely surviving? Are grass plants sending out runners and actively growing, or just hanging on? Dense grass versus thin, weak grass makes the difference between overseeding success and failure. Weed types and density tell us what you're competing against. What kinds of weeds dominate - aggressive spreaders like creeping charlie or just dandelions? Are weeds dense and well-established with deep root systems, or scattered and relatively new? Weed density indicates how much competition new grass faces and whether killing weeds will leave enough space for grass to fill in. Bare areas reveal underlying problems. How much bare ground exists? Why are areas bare - is it compaction, shade, water issues, or just neglect? Can grass actually grow in these areas, or are underlying issues preventing establishment? Sometimes bare areas indicate problems that need fixing before any grass establishment approach will work. Soil condition affects everything. Is soil compacted from years of neglect and lack of aeration? Does water pool in areas indicating drainage or severe compaction problems? What's the soil quality - actual topsoil or mostly clay and poor soil? We can't grow grass in terrible soil regardless of which method we use. Surface issues from neglect include bumps, dips, and uneven areas. Erosion damage in spots. Depressions where trees were removed years ago. Overall surface condition affects both lawn appearance and which renovation approaches are practical. Shade and growing conditions determine what's realistic. How much shade exists from mature trees? Can grass realistically grow in all areas, or are some sections too shady for any grass to thrive? Some areas might need landscape alternatives instead of lawn. This assessment determines which renovation approach makes sense and which approaches will fail regardless of effort and investment. When Overseeding Works (And When It Doesn't) Overseeding works when you have 60-70% decent grass coverage. The grass is just thin, not dying. Weeds are present but not overwhelming. Soil condition is reasonable. The lawn basically just needs thickening and a boost. What overseeding accomplishes is filling in thin areas, thickening overall coverage, and introducing improved grass varieties. It's a relatively affordable approach for lawns that have decent foundation to build on. Overseeding fails when the lawn is mostly weeds with little grass. There's nothing to build on - you need existing grass for overseeding to work. It fails when grass is severely thin or dying because the existing grass is too weak to support new growth filling in. Heavily compacted soil prevents seed from establishing. Extensive bare areas need more than just thickening. We've assessed many St. Louis Park lawns where homeowners thought overseeding would work. When we actually evaluate grass coverage and viability, often the lawn needs more than overseeding. Better to understand this upfront than waste $500-$1000 on seed and effort that won't succeed. If your lawn is 60% weeds and 40% struggling grass, overseeding won't fix it. The weeds will choke out new seedlings just like they're choking out existing grass. You need to kill weeds first, but after killing 60% of your lawn, you don't have enough grass base for overseeding to work. That lawn needs reseeding or sodding. When Full Lawn Reseeding Makes Sense Reseeding is right when your lawn is 40-60% weeds and 40-60% struggling grass. Bare areas are substantial but soil is reasonable. After killing weeds, you'll have space for seed to establish. You can stay off the lawn for 6-8 weeks during establishment. Budget doesn't allow for sodding but the lawn needs complete renovation. What reseeding accomplishes is complete grass coverage eventually, a fresh start with improved grass varieties, and addresses moderate to severe neglect. More affordable than sodding while still providing complete renovation. Reseeding challenges include time - 6-8 weeks before the lawn is useable. Requires consistent watering during establishment. Need to keep family and pets off grass while it's establishing. Results aren't immediate like sodding. Success depends heavily on proper preparation and ongoing care. Reseeding works well after killing weeds when you have reasonable soil to work with. You've addressed surface and drainage issues before seeding. Timing is right - fall is ideal in Minnesota for seeding. You can manage the establishment period without needing the yard for weeks. We've reseeded many severely neglected St. Louis Park lawns successfully. It requires proper preparation but delivers great results when done right. The key is honest assessment that reseeding is appropriate for your lawn's condition, not just cheaper than sodding. When Sodding Is the Best Choice Sodding makes sense when your lawn is 70% or more weeds with minimal salvageable grass. You need the yard useable quickly for kids, pets, or just family use. Bare areas are extensive throughout. You want immediate results and budget allows for higher upfront investment. What sodding accomplishes is instant lawn that looks established immediately. Useable in 2-3 weeks for light use, 4-6 weeks for normal use. Eliminates uncertainty of seed establishment. Works in situations where seeding feels too risky or takes too long. Sodding advantages over seeding on neglected lawns are significant. No waiting 6-8 weeks to use your yard. Less vulnerability to washout or establishment failure. Immediate weed suppression because sod is dense, mature grass. Better for families who need the yard functional quickly and can't keep everyone off grass for two months. Sodding is worth the investment when lawn is beyond what overseeding or reseeding can realistically fix in reasonable timeframe. You can't keep family off lawn for extended establishment period. You want to enjoy your yard this season instead of waiting until next year. Immediate results justify higher cost for your situation. We install sod on St. Louis Park lawns where condition is so poor that seeding feels too risky, or where family needs mean waiting months for grass establishment isn't practical. Sometimes the right answer is spending more upfront to get results that actually work for how you need to use your property. 
By Kent . November 8, 2025
Build Next Door Flooding Your Minnetonka Yard Your yard worked fine for years. Then construction started next door, and now you've got standing water after every rain. The grass is dying, water's heading toward your foundation, and you're watching it get worse with every storm. New construction changes everything about how water moves. One grading session with a bulldozer can redirect flows that worked naturally for decades. But here's the part most people miss: you've probably got two to three weeks while permits are still open to get this addressed. After that, you're on your own. What Actually Happens During Construction When they clear that lot and bring in the heavy equipment, they're not thinking about your drainage. They're focused on making their site work for construction. But here's what's actually happening to the soil - both theirs and potentially yours. Those excavators and loaded dump trucks compact soil three to four feet down. We've measured this on dozens of sites - you can see it when we dig French drain trenches next to new construction. The soil structure is completely destroyed for the first three to four feet. Even soil on your side of the property line gets affected by the vibration and the sheer weight of equipment operating twenty feet away. You end up with what we call hardpan - we've hit it with excavators and it's almost like concrete underground. Water hits it and has nowhere to go. Then they grade their site. They need it level for the foundation, for the driveway, for everything they're building. But water doesn't care about their construction plans - it goes downhill. We've worked on properties where the neighbor's finished grade is only six inches higher, and that's enough to turn a previously dry yard into a collection point for the entire block. The trees they removed? We've seen this play out repeatedly - a half-acre wooded lot that used to absorb thousands of gallons during storms gets cleared, and suddenly all that water is running off instead. Their new sod, planted last month, isn't doing anything close to what those mature trees were handling. Here's what surprises people: sometimes your own yard stops draining right even when their water isn't coming over. We've diagnosed this on multiple properties - the soil compaction from construction activity affects yards beyond the property line. The ground that used to absorb your own rainfall can't anymore because the structure's been damaged three feet down. We've seen homeowners wait two or three years for that to "settle" naturally, and it doesn't happen. The Permit Window Is Everything Right now, while construction is active, the builder needs the city. They need inspections to pass. They need that certificate of occupancy. They need permits to close so they can sell the house and get paid. That's your leverage, and it expires fast. We've seen it happen over and over - homeowners wait a few weeks thinking the problem might improve, and by the time they're ready to push for a solution, final inspection has passed and the permit's closed. We had a client last year who waited just three weeks, and by the time we came out to assess the situation, the builder had already gotten final approval and sold the house. Getting them to come back and fix anything at that point was nearly impossible. The building inspector can hold that final approval if there are legitimate code violations or drainage problems that violate the approved grading plan. But they need documentation. We've helped homeowners prepare this documentation - photos, measurements, videos - and we've seen inspectors take it seriously when it's presented clearly. But they need to hear about it before they've already signed off on everything. After permits close, you're dealing with the new homeowner. We've been called by plenty of new homeowners who just spent everything buying the house, had no idea there was a drainage problem, and now their neighbor is (rightfully) upset. They didn't create it, but they own the property now, and getting them to spend five or ten thousand dollars fixing something they didn't know about is an uphill battle we've watched play out many times. Builder Responsibility Versus Reality During construction, it's the builder's problem. They're causing it. They control what's happening on site. The grading, the compaction, the water management - that's all on them. After closing, it becomes complicated. We've worked with plenty of new homeowners who had no idea their builder's grading was going to cause problems for the neighbor. They're not trying to be difficult - they just don't have the resources to fix expensive drainage issues right after closing. We've seen situations where the new owner is just as frustrated as the affected neighbor because they inherited a mess. This is exactly why acting fast matters. We tell every client in this situation: your window to address this while someone with resources and responsibility is still engaged is very short. We've seen too many people miss it, and the solutions become entirely their responsibility and expense. Document Everything Starting Now Take photos before you talk to anyone. Get pictures of standing water with your phone's date stamp showing. Measure how far the water extends from the property line - ten feet, twenty feet, however far it goes. We've used this documentation ourselves when working with building inspectors, and it makes a difference when you can show specific measurements rather than general complaints. Mark where the water collects. Note how long it takes to drain - an hour, six hours, still there the next day. Write down when this started relative to their construction timeline. We've seen cases where homeowners could point to exactly when problems started - right after rough grading, or immediately after they poured the foundation pad - and that timeline matters when you're talking to inspectors. Go to the city's building department and ask to see the approved grading and drainage plan for the construction. It's public record. We've pulled these plans ourselves for clients and found significant differences between what was approved and what actually got built. That difference is your leverage with inspectors. Talk to the Right People at the Right Time The site supervisor is your first conversation. Not the new homeowner who's moving in next month. Not your neighbor's real estate agent. The person running the construction site. We've seen this go both ways - sometimes site supervisors are reasonable and will work with you to address issues. Sometimes they're dismissive and you need to know that quickly so you can escalate. Go over during working hours, introduce yourself, and explain specifically what's happening. "Since grading started, water pools along the property line and flows into my yard. I'm seeing standing water in areas that never had problems before." Keep it factual. In our experience, leading with threats or getting emotional kills any chance of cooperation. If you're not getting anywhere with the site supervisor, call the building department. We've accompanied clients to these conversations. Ask to speak with whoever handles drainage inspections. Explain what's happening and ask them to look at it before final inspection. Show them your documentation. Show them the grading plan versus what actually happened on site. The inspection hold is your strongest card but use it appropriately. We've seen inspectors take drainage complaints very seriously when they're legitimate and well-documented. We've also seen them get frustrated when they feel they're being used as leverage for minor disputes. Make sure you have a real problem with real documentation before you ask them to hold approvals. 
By Kent . November 7, 2025
Turn Your Sloped Minnetonka Yard Into Safe Play Space You bought a house in Minnetonka with a yard. You pictured your kids playing outside, having their friends over, spending summer days running around instead of staring at screens. But your yard slopes so much the kids can't actually use it. The swing set you wanted to install? Can't go on a hill. The trampoline? Dangerous on uneven ground. Even just kicking a soccer ball means chasing it downhill into the fence every single time. We've worked with dozens of Minnetonka families dealing with this exact frustration. You stand at your kitchen window watching your kids play in the neighbor's flat yard because yours isn't usable. The slope that looked manageable when you toured the house turned out to mean your kids can't safely play in their own backyard. Here's what we've learned transforming sloped Minnetonka yards into functional play spaces: it's absolutely achievable, and the difference it makes for families is dramatic. We've seen kids who barely went outside suddenly spending hours in their own yard. We've seen neighborhoods change because one family created the flat space where all the kids want to be. And we've seen parents finally get to use the property they're paying for instead of watching it sit empty because of a slope. Why Minnetonka Has So Many Sloped Yards Minnetonka sits on glacial terrain with natural hills and elevation changes throughout the area. When subdivisions were developed, builders worked with these existing slopes rather than completely flattening everything. Many properties have significant grades - sometimes 10, 15, even 20-degree slopes across the backyard. We've graded and built retaining walls on properties throughout Minnetonka for years. The terrain is just naturally hilly. Some neighborhoods have it worse than others, but if you bought in certain areas, you inherited a slope whether you wanted one or not. The good news is that we've solved this problem on every type of slope Minnetonka throws at us. The Real Dangers of Sloped Yards for Kids Before we talk about solutions, let's be clear about why this matters beyond just convenience. We've seen families try to make sloped yards work before calling us to fix it properly. Here's what actually happens when kids play on significant slopes: Runaway Everything Balls, bikes, scooters, toys - anything with wheels becomes a projectile rolling downhill. We've been on properties where every kicked soccer ball ends up in the fence line at the bottom of the slope. Bikes tip over and roll. Even small toys on wheels become problems. Kids spend more time retrieving stuff from the bottom of the hill than actually playing. We've heard from clients about bikes rolling down slopes and damaging landscaping or equipment at the bottom. Once we create flat play areas, those problems disappear. The investment in flat space saves money on replacing things that get damaged and makes the yard actually functional. Kids Losing Balance and Falling Young kids don't have the coordination to navigate slopes safely. Toddlers learning to run pick up speed going downhill and can't control it - they tumble. We've worked with families after kids got injured falling on slopes. Usually not serious, but scary enough that parents stop letting kids play out there. The problem gets worse in wet conditions. Morning dew on sloped grass becomes a slide. After rain, forget it. Creating flat space means kids can play safely in conditions that made the sloped yard unusable. Play Equipment Becomes Hazardous You cannot safely install a swing set on a slope. The manufacturer guidelines specifically say level ground is required. We've seen swing sets on slopes where one side launches kids higher than the other. The landing zones are uneven. Kids bail out of swings and land on downhill slopes, increasing fall distances. Trampolines on grades are even worse. The frame sits unevenly, creating unbalanced bounce patterns. One side is higher than the other. Kids bounce toward the low side. We've seen trampolines on slopes where kids literally cannot use half the jumping surface safely. The families who call us about this are usually trying to install play equipment they've already bought and realizing it can't be done safely on their slope. We create the flat space they need, and suddenly that play equipment sitting in the garage can actually be used the way it was designed. You Can't See Your Kids On sloped properties, when kids go downhill they disappear from view. You're standing at the kitchen window and you can't see them anymore. The slope creates blind spots. We design our grading and wall projects specifically to maintain sight lines from the house because we know parents need to supervise from inside. One of the most common things we hear from clients after we create flat play areas is that they can finally watch their kids play from the kitchen. Parents tell us they're letting their kids play outside more because they can actually see them now. That alone changes how families use their property. Winter Becomes Dangerous Minnesota winters turn sloped yards into uncontrolled ice slides. Kids go outside to play and the slope is a sheet of ice. They can't walk on it safely, let alone play. The yards where we create flat areas become usable year-round - in summer for active play, in winter we've even built spaces specifically for backyard ice rinks that families flood and use all season. What Actually Makes Yard Space Usable for Kids We've built enough of these projects to know exactly what works. Flat ground is non-negotiable for almost every outdoor activity kids want to do. Not slightly sloped. Not "mostly flat." Actually flat, or close enough that play equipment can be installed safely and kids can run without it being a hazard. Minimum Flat Area Requirements Based on projects we've completed throughout Minnetonka, here's what you actually need: For a swing set or basic play structure, you need minimum 20x20 feet of flat space. That gives you room for the equipment plus required fall zones around it. We've created spaces this size on properties where families initially thought it was impossible given their slope. Trampolines need at least 15x15 feet flat, though we recommend bigger if possible. You need clearance around the trampoline, and it needs to sit completely level. We've built dozens of flat areas specifically for trampolines throughout Minnetonka. If you want a sport court or backyard hockey rink - and we've built several of these - you're looking at 30x50 feet minimum, preferably larger. These are some of our favorite projects because they create spaces older kids and teens actually use constantly. We've heard from families that their teenagers are outside for hours every day now that they have functional space, whereas before they were always inside. For general play area where kids can run around, kick balls, play tag, set up goals - you need at least 400-600 square feet of continuous flat space. We've created areas this size and larger throughout Minnetonka on slopes that looked completely unusable before we got there. The Kitchen Window View When we design flat areas, we position them where parents can see from kitchen windows, deck, or main living spaces. We've learned this matters enormously for families with young kids. Parents want to let kids play outside while they're making dinner or working inside. On sloped properties, this often means creating flat space at a specific elevation that maintains visibility from the house. Sometimes that means cutting into the slope at a certain level. Sometimes it means building a wall to create a raised flat area that's visible from inside. We think about this during every design because we know it determines whether families actually use the space we create. Creating Flat Space: Grading Solutions On properties with moderate slopes and enough depth, we can create flat areas just by moving soil around. This is grading work - cutting into the hillside, redistributing that soil, creating level areas where there was slope before. We've graded dozens of Minnetonka yards where this approach worked beautifully. The property had maybe a 10-12 degree slope, enough room to work with, and we brought in equipment to cut and fill. Cut into the high side of the slope, use that soil to fill in the low side, compact everything properly, establish drainage pitch, and you end up with usable flat space. When Grading Works Best This approach works great when you've got moderate slope, enough property depth to work with (usually at least 40-50 feet), and soil conditions that allow for cut and fill work. Minnetonka's clay soils are actually excellent for this - clay compacts well and holds grades once it's properly compacted. We've done grading-only projects that created 30x40 foot flat areas, 25x50 foot areas, even larger depending on the specific property. Grading projects typically take a few days to a week depending on scale, weather, and site access. The equipment we use can maneuver in residential yards without destroying everything. The results speak for themselves. Families call us after grading projects saying their kids are outside constantly now, having friends over, actually using the yard. That's the transformation we're after - taking unusable sloped space and making it functional for family life. Retaining Walls: Creating Dramatic Transformations When slopes are steeper - above 15-20 degrees - or when you don't have much property depth to work with, retaining walls become the solution. This is where we create the most dramatic transformations. Properties that looked completely hopeless become functional play spaces that families use constantly. How Walls Create Usable Space A retaining wall holds back earth, creating a flat terrace. On a sloped property, you build a wall and suddenly you have flat space that would be impossible with the natural grade. We've created flat play areas on properties where the original slope was 20-25 degrees - completely unusable for kids. After the wall and grading, they have flat space for swing sets, sports, whatever they want. The wall does the work of holding back soil that would otherwise slope. Think of it like creating a flat step on a staircase. The wall is the vertical face, and the flat area is where kids play. On properties with severe slopes, we sometimes build multiple walls creating multiple flat terraces at different elevations. Real Transformations We've Built We've built retaining walls throughout Minnetonka specifically to create kids' play spaces. Properties with 20+ degree slopes that were completely unusable. We built walls, created flat areas of various sizes, and transformed those yards into functional spaces. We hear consistently from families after these projects that it completely changed how they use their property. Kids are outside constantly. The play structures are getting used daily. Friends come over to play in their yard instead of everyone going elsewhere. Parents tell us it's the best investment they've made in their home because it made the yard actually usable. We've built backyard hockey rinks on properties where the slope made it seem impossible. In summer they're open space for sports and activities. In winter families flood them for skating. The teenagers are out there skating regularly. Before we created those flat spaces, the backyards sat unused year-round. Now they're neighborhood gathering spots. Sport courts are popular projects. We've created flat areas large enough for basketball, street hockey, and general sports on properties that had significant slopes. Those courts get used daily. The investment in creating that space pays off in how much the kids use it. Why Walls Work So Well Retaining walls let us create flat space on slopes where grading alone wouldn't be practical. They're permanent, durable structures that last decades when built properly. We've built walls throughout Minnetonka that are many years old and still performing perfectly. The walls themselves become features in the landscape. We've built walls with sitting caps where families can watch kids play. We've integrated lighting into walls for evening use. We've created walls that define spaces and make yards more functional beyond just the flat area they create. Materials That Last Segmental block walls are common in our projects. These are engineered concrete blocks designed for retaining wall applications. They're durable, available in various colors and textures, and hold up beautifully in Minnesota's climate. We've built segmental block walls that have been in place for many years and still look great. Natural stone walls have a more traditional appearance and work well in certain landscape designs. Some homeowners prefer the aesthetic. We've built stone walls throughout Minnetonka on properties where appearance was a priority. The material choice affects cost, appearance, and longevity. We discuss options during planning based on budget, aesthetic preferences, and what you're trying to accomplish. Proper Drainage Is Non-Negotiable Every retaining wall we build includes proper drainage. This means perforated pipe in gravel backfill behind the wall, wrapped in filter fabric, sloped to drain water away. We also include weep holes through the wall face at regular intervals. Water management behind retaining walls is critical. Water builds up behind walls from rainfall, from uphill drainage, from seasonal groundwater. If that water can't escape, pressure builds and the wall fails. We've been called to repair walls built by others where drainage was inadequate or nonexistent. Proper drainage from the start prevents these problems and ensures walls last for decades. Multiple Tiers for Severe Slopes On properties with very steep slopes, we sometimes design multi-tier systems. Multiple walls at different elevations, creating multiple flat zones. We've built properties where the upper tier has the play structure and flat lawn area, and a lower tier has a fire pit and seating area. Both are usable spaces, just at different levels connected by steps. Multi-tier designs maximize usable space on properties where a single tier wouldn't create enough flat area to be functional. They require more planning and investment but create multiple functional zones that families use in different ways. Combining Grading and Walls Most projects we do involve both grading and retaining walls working together. We build a wall to create a flat tier and then grade within that tier to maximize usable space and establish proper drainage. The wall does the heavy lifting of creating the tier, and the grading optimizes the space we've created. We've done projects where one wall created substantial flat areas. We've done projects where multiple walls created different zones. Every property is different, and we figure out what's going to work best for that specific situation. 
By Kent . November 7, 2025
When to Spray Weeds in Blaine You invested in lawn renovation - seeding or overseeding your Blaine yard to get thicker, healthier grass. The new grass is coming up, but so are weeds. Lots of weeds. You don't know when it's safe to spray without killing the grass seedlings you just spent money establishing. Wait too long and weeds choke out your new grass. Spray too early and you kill the grass yourself. You're stuck watching weeds take over while your fragile new grass struggles to establish. Based on what we've seen managing lawn renovations throughout Blaine, weed control timing is where most DIY lawn renovations fail. This is exactly why professional lawn care is worth hiring. Why Weed Control Timing Is So Critical (And So Easy to Get Wrong) Lawn seeding creates perfect conditions for weeds too. Bare soil, regular watering, disturbed ground - everything weeds love. Your new grass seedlings germinate, but so do thousands of weed seeds that were waiting in the soil. The same conditions that help grass establish help weeds thrive. New grass seedlings are extremely fragile for the first 4-6 weeks. Herbicide that doesn't harm mature grass kills young seedlings easily. The window for safe treatment is narrow and depends heavily on temperature. Get timing wrong in either direction and you've wasted your entire seeding investment. Most homeowners don't know the specific timing requirements for treating weeds around new grass. They don't know how temperature affects treatment safety. They don't understand that grass looking established doesn't mean it can handle herbicide stress. This is where professional lawn care pays for itself - we've managed hundreds of lawn renovations and know exactly when treatment is safe. The Three Critical Phases: Before, During, After Before seeding, if your lawn is overrun with weeds, we treat with post-emergent herbicide to kill existing weeds. This step creates voids where new grass can establish. When weeds die, they leave space for new seedlings to fill in without competition. Most DIYers skip this step and seed directly into weedy lawns. The existing weeds immediately compete with new grass, and the weeds usually win because they're already established with deep roots. We never seed without killing weeds first. This pre-seeding treatment happens 2-3 weeks before we seed, giving weeds time to die completely and creating the space new grass needs. During seeding and the first few weeks after, no weed control is possible. You're just watering and waiting for germination. Weeds will start germinating alongside your grass. This is frustrating but necessary. You can't spray anything without killing the grass seedlings you're trying to establish. Professional timing plans for this vulnerable gap and addresses weeds as soon as grass can safely handle treatment. After seeding, you must wait minimum 4-5 weeks before any weed control treatment. New grass must be established enough to handle the stress that herbicide creates. Temperature matters enormously during this period. Wrong timing here kills your renovation investment. Professionals know exact timing for Blaine's specific climate and conditions. Why You Can't Just "Spray Weeds When You See Them" New grass seedlings look established before they actually are. Grass that looks green and growing can still be extremely vulnerable. You can't tell by looking when grass is ready for herbicide treatment. It's not about grass height - it's about root development happening below the surface that you can't see. Herbicide stress kills seedlings that look perfectly healthy. The visible grass appears fine, then dies over the next week as the combined stress of herbicide and maintaining growth overwhelms the immature root system. By the time you realize the grass is dying, it's too late to save it. Temperature and weather conditions affect timing dramatically. What worked for your neighbor's lawn last year might kill your lawn this year if conditions are different. Professional assessment based on actual grass development and current weather conditions prevents these expensive mistakes. 
By Kent . November 4, 2025
Seasonal Snow Removal vs. Per-Storm for Blaine Businesses You manage a Blaine property or business that needs snow removal. Parking lots, walkways, entrances need to be clear and safe all winter. You're comparing seasonal contracts versus per-storm pricing and trying to figure out which makes sense. The decision affects your liability exposure, service reliability, and budget predictability. Based on what we've seen working with commercial properties throughout Blaine, most businesses don't understand the real difference between these models until it's too late. Wrong choice means unreliable service exactly when you need it most. Understanding Your Liability as a Commercial Property Slip and fall lawsuits are expensive and common in Minnesota winters. Property owners and managers are legally liable for unsafe conditions on their properties. Snow and ice create significant liability exposure that you can't ignore or minimize. You need guaranteed service, not "we'll try to get there when we can." This is fundamentally different from residential snow removal where inconvenience is the main consequence. For commercial properties, inadequate snow removal creates legal liability, affects business operations, and impacts tenant or customer satisfaction. Many commercial insurance policies require proof of snow removal contracts. Your insurance company wants to see documented arrangements for winter maintenance. "We call someone when it snows" doesn't satisfy insurance requirements or provide liability protection when someone gets injured on your property. Can't afford to be without service during major storms. That's exactly when slip and fall risk is highest, when customers or tenants most need access, and when your liability exposure peaks. The snow removal model you choose determines whether you're protected during these critical times. How Seasonal Snow Removal Contracts Work Seasonal contracts provide unlimited plowing and clearing for the entire winter season, typically November through April in Minnesota. You pay a fixed cost regardless of how much snow falls. Service is triggered automatically at predetermined depths - usually 2 to 3 inches - without you needing to call or request service. What seasonal contracts include: priority service during all storms, guaranteed response times specified in the contract, salt and ice melt application either included or available as add-on, walkway clearing in addition to parking lot plowing, and 24/7 monitoring with automatic response when snow reaches trigger depth. Pricing structure is fixed cost for the season paid in installments, usually 4-5 payments spread from November through March. Cost is determined upfront based on property size, services needed, access considerations, and specific requirements. You know exactly what you'll pay before winter starts regardless of whether we get 30 inches or 70 inches of snow. Why companies offer seasonal contracts: This model allows proper staffing with reliable employees who know they have guaranteed work all winter. We can guarantee response times because we know our revenue and can maintain appropriate crew levels. Equipment and personnel costs are covered regardless of snowfall amounts. Seasonal income provides stable foundation to maintain quality service throughout winter. At KG Landscape, we only offer seasonal contracts for commercial properties because this model is the only way we can provide the reliability commercial clients need. We maintain crews, equipment, and response capability that per-storm pricing can't support. 
By Kent . November 3, 2025
Fixing Drainage Problems in Your Older St. Louis Park Home You fell in love with the character of older St. Louis Park homes. The established neighborhoods, mature trees, solid construction. Then the first heavy rain came and you saw the problems. Water in the basement. Soggy yard that stays wet for days. Erosion around the foundation. Your downspouts dumping water right next to the house. The previous owners lived with these issues or band-aided them with temporary fixes. You don't want to spend the next decade dealing with water problems every time it rains. Based on what we've seen throughout St. Louis Park, most drainage issues in older homes are completely fixable with the right approach. Why Older St. Louis Park Homes Have Drainage Issues Homes built 40, 50, 60+ years ago were constructed with different drainage standards than we use now. Original grading has settled and changed over decades. Landscaping added over years without considering drainage has created problems. Downspouts and sump pumps discharge in locations that cause damage. We work on older homes throughout St. Louis Park constantly. These aren't unique problems - they're predictable issues with older properties. The good news is we know how to fix them permanently. The patterns repeat across neighborhoods. Once you understand what's causing problems, the solutions become clear. The longer you wait to address drainage comprehensively, the more damage accumulates. Basement moisture becomes foundation damage. Soggy areas destroy landscaping. Erosion washes away soil. We've been called to properties after years of drainage damage where homeowners spent thousands on temporary fixes that didn't solve root causes. Better to address everything properly now than patch repeatedly for years. Step 1: Find a Contractor Who Sees the Whole Picture Most contractors fix individual symptoms without addressing root causes. They'll extend one downspout or add some rock in a low spot. The problems keep coming back because the underlying issues weren't addressed. You need someone with knowledge and experience who looks at your yard as a whole system, not isolated problems. At KG Landscape, we assess how water moves through your entire property. Where does it come from? Where does it go? What's working and what isn't? We make a plan that ensures everything drains properly long-term. We've worked on dozens of older St. Louis Park homes. The issues are similar - poor grading, inadequate systems, band-aid fixes that didn't work. Our approach is understanding the complete picture before recommending solutions. That way you're not spending money on fixes that don't address the real problems. Step 2: Grade Around the House Properly This is the foundation of any drainage solution. Proper grade around your house slopes away from the foundation - minimum 6 inches drop in the first 10 feet. This prevents water from flowing toward your basement or pooling against the foundation. We assess existing grades around your foundation on older homes constantly. Often we find areas where grade slopes toward the house or is too flat. Settlement over decades has changed original grading. Landscaping added without considering drainage has created problems. Mulch beds built up over years have actually raised grades near the foundation. Getting foundation grading right prevents basement water and protects your foundation from water damage. Everything else builds on this. If water is flowing toward your house, nothing else we do will fully solve your drainage problems. We regrade around foundations to create proper slope away from the house. This is often the single most important fix. Step 3: Ensure the Yard Drains Properly Beyond the foundation, the whole yard needs proper drainage. Low spots where water collects become soggy unusable areas. Poorly graded yards send water where you don't want it - toward patios, into garden beds, creating muddy areas you can't use. We assess overall yard grading and drainage patterns. Where does water naturally flow? Where does it collect? Are there high spots and low spots creating problems? Sometimes regrading solves issues. Sometimes we need French drains to intercept subsurface water. Sometimes catch basins at collection points. Sometimes swales directing water to appropriate discharge areas. The goal is water moves through your yard appropriately without pooling or causing damage. We've regraded countless St. Louis Park yards on older properties. Proper yard grading makes properties actually usable instead of having areas you avoid because they're always wet. Step 4: Fix Downspout and Sump Pump Discharge Downspouts dumping water right next to your foundation cause massive problems. All that roof water concentrates at one point. It pools against the foundation, creates soggy areas, erodes landscaping, and often ends up in your basement. Same problem with sump pump discharge dumping right at the foundation - you're pumping water out of the basement only to have it soak back in. These concentrated water sources overwhelm inadequate drainage. Even if your grading is decent, dumping hundreds of gallons in one spot creates problems. Underground downspout systems move water away properly. We install pipes carrying downspout water away from the foundation and discharge it where it won't cause problems - to the street, storm sewer, or back corner of the yard where that water can disperse safely. Underground sump pump drainage pipes do the same thing. We run pipes from your sump pump discharge far from the house so that water can't come back. We install these systems throughout St. Louis Park. Eliminating concentrated discharge near your foundation solves a huge percentage of drainage issues. How Everything Works Together Comprehensive drainage systems have multiple components working together. Foundation grading prevents water from reaching the house. Yard grading moves surface water appropriately. Underground downspouts and sump discharge handle concentrated flows from roof and basement. French drains intercept subsurface water before it causes problems. Catch basins collect water at low points. Everything works as an integrated system. We've designed complete systems on older St. Louis Park properties where each component supports the others. When one piece is missing, the whole system doesn't work as well. That's why comprehensive planning matters more than individual fixes. 
By Kent . November 1, 2025
Snow Removal Companies Protect Your Golden Valley Landscape You need snow removal for the upcoming winter, but you're concerned about damage to your landscape. You have nice landscaping, mature shrubs, retaining walls, a well-maintained lawn. You've heard horror stories from neighbors or experienced damage yourself - plow blades tearing up lawn edges, evergreens buried under massive snow piles, damaged walls from careless plowing. Spring arrives and you discover the damage snow removal caused all winter. Dead plants, torn-up grass, broken structures. Based on what we've seen throughout Golden Valley, landscape damage from snow removal is completely avoidable with proper approach. The difference between companies is planning and care, not just getting snow out of the way. Why Landscape Damage Happens (And Why It's Avoidable) Common causes of damage include wrong equipment for the situation, no planning about where snow can safely be piled, no property boundaries marked under snow, crews that don't know your property, rushing without attention to detail, and companies that don't care about anything beyond clearing snow quickly. The financial impact is significant. Replacing damaged evergreens costs $100-500 each or more for mature specimens. Repairing torn-up lawn areas runs $500-2000. Fixing damaged retaining walls or fences costs $500-5000 or more. Damage accumulates over the entire winter. One careless season can undo years of landscaping investment you've made in your property. The good news is this is completely avoidable. Proper planning eliminates most damage through right equipment selection, clear mapping and communication to crews, boundary staking so crews know where they can plow, trained crews who understand landscape protection, and companies that value long-term customer relationships over quick efficiency. Equipment Selection: Using the Right Tool for Each Situation Plows work well in open driveways with adequate width of 12 feet or more, areas without tight spaces or obstacles close by, and properties with room to maneuver equipment. Standard residential driveways without complications are perfect for plow service. Plows create risk in narrow driveways less than 10-12 feet wide, close to retaining walls where the blade could strike the structure, near fences where pushed snow causes damage, tight spaces with landscaping features on both sides, and areas with features buried under snow that aren't visible to the driver. We use snow blowers instead in tight spaces where plows can't maneuver safely, close to retaining walls within a few feet where contact is likely, narrow driveways under 10-12 feet wide, near fences where pushing snow would bend or break panels, and areas with delicate landscaping requiring careful clearing. Equipment choice matters because snow blowers throw snow away from the area rather than pushing it forward like plows do. This allows precise control in confined spaces and eliminates contact with walls, fences, and landscaping. Snow blowing takes more time than plowing but saves the expense of repairing damage. When evaluating companies, ask: Do you use snow blowers for tight spaces? How do you determine when to use plow versus blower? What equipment do you have available? Do drivers have both options on their trucks? Property Mapping: Planning Where Snow Can Go Mapping matters because not all areas of your property can safely receive piled snow. Some plants tolerate burial, others don't and will die. Structures can be damaged by heavy piles against them. Planning where snow goes eliminates problems before they occur rather than discovering issues in spring. What gets documented includes location of all evergreens and valuable shrubs you want protected, retaining wall locations and heights, fence lines and sensitive areas near them, perennial beds versus lawn areas, obstacles that will be buried under snow, and your specific concerns and priorities for landscape protection. Snow can be piled safely over perennials that die back completely each season, on lawn areas that regrow from roots in spring, away from structures and delicate plants, in areas you designate as acceptable, and spots where snow naturally melts and drains without causing problems. Snow should never be piled on evergreens that keep their growth year-round, on shrubs that won't recover from weight and pressure, against fences where weight and moisture cause structural damage, against retaining walls where pressure can crack or shift blocks, over buried landscape features that could be damaged, or excessively near building foundations. This planning eliminates specific damage scenarios. Evergreens buried under heavy piles have branches break and often die completely. Shrubs crushed by weight don't recover in spring. Fences pushed by heavy accumulation bend or break. Retaining walls can crack from sustained pressure throughout winter. All avoidable with proper planning about snow placement. How We Create Property Maps for Snow Removal Our mapping process starts with walking your property before winter with you present. We document all landscape features and your specific concerns. We photograph the property from multiple angles showing current conditions. We identify safe versus unsafe areas for snow placement. We create clear maps with detailed notes. Then we provide this information to crews through tablets showing maps, photos, and instructions during service. Crews access these maps through tablets in their trucks displaying property layouts and photos. Notes appear on screen during service so drivers see important information. Drivers know exactly where snow can be placed safely. New drivers can service your property correctly even on first visit. This creates consistency regardless of who's plowing on any given day. This matters because it eliminates "we didn't know that was there" excuses. It removes guessing by crews about where they can put snow. It protects your landscape investment through documented planning. It creates accountability and consistency. This is a systematic approach versus just showing up and winging it each storm. Staking: Marking Boundaries Before Snow Covers Everything Staking involves placing reflective markers along driveway edges to mark boundaries so crews can see edges when snow covers everything. This eliminates plowing over lawn or into landscape areas. Markers are installed before first snow covers your property. Boundaries disappear under snow because everything looks the same when covered in white. You can't see where driveway ends and lawn begins. Landscape features are completely buried and invisible. Curbs and edges disappear. Drivers operate based entirely on what they can see, which is very limited under snow cover. Without staking, plow blades run over lawn edges repeatedly, tearing up grass that needs expensive repair in spring. Plows hit buried retaining walls causing structural harm. They damage shrubs and evergreens that aren't visible under snow. Each storm accumulates more damage throughout winter. Staking stops this by providing clear visual markers showing exact boundaries. Crews know where they can and can't operate the plow. It protects lawn edges from blade damage and prevents hitting buried features. Staking works even in heavy accumulation and darkness during early morning plowing. Quality staking uses markers every 10-15 feet along edges, tall enough to stay visible through heavy snow, reflective material for visibility at night and early morning, placed before season starts, and checked and replaced if damaged during winter storms. The Difference Between Careful and Careless Service Careless snow removal focuses on getting snow out of the way as fast as possible. No thought about where it goes or what it might damage. Using only plow regardless of situation or space constraints. No property knowledge or planning before arriving. Different driver every time who doesn't know your property. Damage is considered "just part of snow removal" rather than avoidable. Careful service uses a planned approach for each property. Right equipment selected for each situation and area. Clear knowledge of where snow can be placed safely. Protecting landscape is priority alongside clearing snow effectively. Same driver learning your property better all season. Damage is considered unacceptable. The financial calculation reveals the truth. Careless service seems attractive with cheaper upfront pricing. But spring reveals expensive problems. The total repair costs often exceed the entire season's snow removal fee, making the "cheap" service actually very expensive. Value comes from slightly higher upfront pricing but no spring surprises. Your landscape stays intact and healthy. Long-term protection of your property investment. Peace of mind throughout winter knowing your landscape is being protected, not harmed. 
example of sloped property drainage
By Kent . November 1, 2025
Your Maple Grove Drainage System Failed You invested in a drainage system to solve water problems on your Maple Grove property. French drains, catch basins, underground downspouts were installed. It worked for a while, then problems came back. Or maybe it never worked properly from the start. Now water is pooling where it shouldn't. Your yard stays soggy. You're frustrated and don't know if you need repairs or complete replacement. You don't want to waste money on the wrong solution. Based on what we've seen throughout Maple Grove, most drainage failures have identifiable causes. Understanding why your system failed helps determine the right fix. Why Drainage Systems Fail (And When They Can Be Fixed) Common failure modes include clogging from debris and sediment accumulation, systems overwhelmed by more water than they were designed to handle, physical damage to pipes or components, poor original design that never functioned properly, settling and grade changes over time, and discharge points that failed or got buried. Some failures are simple fixes like cleaning or targeted repairs. Some require partial rebuilding of specific sections. Some indicate the system is fundamentally inadequate and needs complete redesign. Professional assessment determines which situation you're facing. Diagnosis matters because you don't want to replace a system that just needs cleaning. You also don't want to spend money repairing a system that's fundamentally inadequate for your property. Right diagnosis saves money and actually solves your problem. Wrong diagnosis means wasting money without fixing anything. Sign #1: Water Takes Too Long to Drain Water eventually goes away but takes hours or days when it used to drain quickly. Puddles linger where they used to disappear fast. The system is clearly still working but not efficiently anymore. Slow drainage is caused by pipes clogged with sediment, catch basins full of debris, outlet partially blocked, tree roots infiltrating pipes, or sediment buildup in gravel around pipes. This happens over time as systems collect sediment gradually, organic debris accumulates, tree roots grow into pipes seeking moisture, and normal wear occurs without maintenance. Often this can be fixed through cleaning and maintenance. Jetting pipes to clear sediment, cleaning catch basins, cutting roots from pipes, and performing maintenance that was never done can restore function. Many drainage systems just need maintenance but homeowners think they need complete replacement. However, slow drainage sometimes indicates bigger problems. If the system was undersized from the start, has too much water for its capacity, or has outlet elevation too high creating poor slope, these require more than just cleaning. Professional assessment determines whether you're dealing with maintenance issue or fundamental design problem. Sign #2: Area Stays Muddy or Mushy for Days Soggy areas don't dry out. Muddy spots persist days after rain. Areas even stay mushy without rain due to irrigation running. The problem area that drainage was supposed to fix is still problematic. This indicates the system isn't intercepting water effectively. The drain may be too shallow for the depth where water is traveling. The drain may not be in the right location for your water source. The system may be completely failed underground. Or the system never worked properly from installation. Possible causes include drain installed at wrong depth with water traveling below it, wrong location for the actual water source, pipe separated or broken underground, outlet blocked so water backs up, or system never designed properly for your specific problem. Systems fail to address soggy areas when they didn't intercept water at the depth it travels, were installed in wrong location for the water source, are undersized for water volume, or resulted from poor understanding of where water was coming from. These are often design flaws rather than maintenance issues. Diagnosis requires determining if the system is functioning at all, checking if water is actually reaching the drain, verifying the outlet is working, and possibly excavating to inspect underground components. Professional assessment determines if this is fixable or needs complete redesign. Sign #3: Can't Find the Discharge End of Underground Downspout Your underground downspout was installed to move roof water away from your foundation. You can't locate where water actually comes out. There's no visible discharge at yard edge or street. You don't know if the system is working or where water goes. This is concerning because the pipe may have separated underground, the discharge may be buried or covered over, water may be dumping somewhere you can't see it, and it could be causing problems you don't realize exist. Common underground downspout failures include pipe separated at connections, discharge point buried during landscaping work, pipe crushed by vehicles or settling, discharge blocked by debris, or pipe never properly connected from the start. When discharge fails, water dumps underground near your foundation, creates new problem areas you can't see, defeats the entire purpose of the underground system, and may be causing foundation issues without visible symptoms above ground. To diagnose this, run water through the downspout during dry weather and watch where water appears if anywhere. You may need to excavate to find the separation point. Camera inspection can locate breaks in the line. Professional diagnosis locates the problem efficiently. Usually this can be fixed by finding and repairing the separation, reconnecting pipes, clearing blocked discharge, or sometimes rerouting if the original path failed. Generally this is fixable without complete system replacement, but you need to locate where the failure occurred. 
By Kent . October 31, 2025
Your Neighbor's Water is Flooding Your Yard in Edina You didn't cause this problem. You're not the one who graded their yard poorly, installed that massive patio, or redirected their downspouts toward the property line. But somehow, their water is now pooling in your lawn, killing your grass, and maybe even threatening your basement. And you're the one dealing with the consequences. Let's get real about something: if your property sits lower than your neighbor's, water is coming your way. That's just gravity, and there's nothing you can do to change physics. However - and this is the important part - while you can't control the problem, you are in complete control of the solution. Working with professional yard drainage contractors who understand these situations means you can install drainage systems that manage or divert water draining into your lawn from neighboring properties, regardless of what your neighbor does or doesn't do about it. The Critical Window Nobody Tells You About Here's something most Edina homeowners don't know until it's too late: the absolute best time to address a neighbor's drainage problems affecting your yard is DURING CONSTRUCTION. Whether it's a large renovation project or a new build going up next door, these projects require permits from the city that need to be approved and eventually closed out before the project is considered complete. Cities can hold these permits open in certain circumstances if drainage issues aren't being properly addressed. This may be your one and only opportunity for the city to step in between you and a builder or neighboring property owner to ensure they're actually responsible for fixing the water runoff problems their changes are causing in your yard. Miss this window, and you've likely missed your chance for any kind of official intervention that doesn't involve lawyers. The Awkward Conversation (And Why It Usually Fails) Before anything else escalates, you should talk to your neighbor - to the extent it can be done cordially. Simply asking them to redirect a downspout or adjust where their sump pump discharge line empties can be a great way to start addressing the issue. We get it though - these can be incredibly sensitive issues that turn neighborly relationships sour fast. Sometimes a simple conversation actually works. Your neighbor might not even realize their water is causing drainage problems on your property. They might be completely willing to make a minor adjustment that reduces the water flows coming your way. It costs nothing to ask politely, and occasionally you'll find someone who genuinely wants to be a good neighbor and fix the situation. But here's the reality from our many years of handling these situations: even well-intentioned neighbors rarely follow through with meaningful fixes. You need to be prepared for this outcome and have a backup plan that doesn't depend on their cooperation. The Hard Truth About City Enforcement This is where most homeowners think they'll find relief: "Can't the city make them fix this? There must be codes against flooding your neighbor's yard, right?" It's a reasonable assumption. Unfortunately, it's also wrong in most cases, and understanding this reality early will save you months of frustration. Here's what we've learned in our many years working on drainage issues throughout Edina: it is extremely rare for cities to enforce their own codes or easements when it comes to how they affect neighboring properties. That's typically considered a civil matter between private property owners, not something the municipality wants to get involved in arbitrating and enforcing. Even when drainage codes exist on the books - and they do - actual enforcement between neighbors almost never happens unless there's a clear violation of a specific easement or the situation is causing genuine property damage that's been extensively documented. The city might send someone out to look, they might agree that it's unfortunate, but they'll usually tell you it's between you and your neighbor to resolve. Set your expectations accordingly and move forward with solutions you can actually implement yourself. The Expensive Mistake: Taking Your Neighbor to Court The money and stress caused by going to court with your neighbors over water damage? That can be put to much better use just solving the issue and salvaging the neighborly relationship. Legal battles drain your wallet, consume your mental energy, and drag on for months or even years - often costing significantly more than drainage solutions would have cost in the first place. Think about the actual math here. Attorney fees, court costs, expert witnesses, property surveys, engineering reports - you could easily spend $15,000 to $30,000 or more trying to legally force your neighbor to fix their drainage. That same money invested in proper systems on your own property solves the problem, stays under your management, and doesn't require your neighbor's cooperation or compliance at all. But there's an even bigger cost that nobody talks about: the only thing worse than a neighbor's property causing water to flow into your basement is having a terrible relationship with your neighbor for many years to come. Home is supposed to be a special place where you find peace and comfort, not where you feel tension every time you see your neighbor outside mowing their lawn or getting their mail. Legal action creates lasting animosity. Even if you "win" in court, you lose the ability to live peacefully in your own home. You'll see this person regularly. Your kids might play with their kids. You'll be at the same neighborhood gatherings. Is forcing them to install a $3,000 fix really worth years of awkward encounters and hostile relations? The answer is almost always no. Smart Solutions That Don't Require Your Neighbor's Cooperation Since you can ultimately only manage the water in your own lawn, the smart move is working on fixes entirely within your property that handle the drainage problems regardless of what's happening next door. This is where experienced drainage contractors who specialize in these neighbor water runoff situations make all the difference in both effectiveness and results. French Drain Systems Along Property Lines A French drain installed along your property boundary intercepts water before it causes problems throughout your yard. These underground drainage systems use perforated pipe surrounded by gravel to collect and channel water away efficiently and invisibly. The beauty of a properly designed French drain is that it captures water as it enters your property, before it has a chance to pool, create soggy areas, or flow toward your foundation. Once installed, it works 24/7 without any maintenance or cooperation from anyone else. Catch Basins Strategically Placed A catch basin positioned exactly where water enters your property collects runoff and redirects it into your drainage system before it can spread across your lawn. These work especially well in low spots where water naturally accumulates or at property line corners where water tends to concentrate as it flows downhill. We typically connect catch basins to underground piping that carries the water to an appropriate discharge location, creating a complete system that handles even heavy rainfall events without creating new landscape drainage problems elsewhere. Channel Drains for Heavy Flow When you're dealing with significant water flows from neighboring properties - not just occasional runoff but actual rivers of water during storms - channel drains provide a linear collection system that handles high volumes efficiently. These are essentially long, narrow drainage grates that intercept water across a broader area than a single catch basin can handle. They're particularly effective when a neighbor's driveway or large paved area is directing concentrated flows toward your property line. Swales That Redirect Without Creating Drama Properly graded swales can redirect water while maintaining good relationships with neighbors because they look like natural landscape features rather than obvious defensive barriers. These shallow, vegetated channels guide water along specific paths using gravity and gentle grading. When designed correctly as part of your overall landscape project, swales blend seamlessly with your existing yard while solving serious issues. They're especially effective in situations where you have some room to work with and want solutions that enhance rather than interrupt your landscape aesthetics. Retaining Walls for Grade Changes Sometimes the best solution involves changing elevations with retaining walls that not only solve drainage problems but enhance your property's appearance and usability overall. A well-placed retaining wall can literally change the game by creating a barrier that forces water to flow around rather than through problem areas. These become features that add value to your property while providing critical protection against water damage from neighbor runoff. They work particularly well in situations where there's a significant grade difference between properties. 
By Kent . October 29, 2025
Tell When It's Time to Replace or Repair a Retaining Wall in St. Paul You walk past your retaining wall every day, maybe noticing it looks different than it used to. Small changes over months or years that you've been ignoring. The wall leans slightly forward. A few blocks are cracked. Some boards look soft. You're not sure if these are serious problems or just normal aging. We get calls from St. Paul homeowners after walls have already failed - collapsed onto driveways, damaged landscaping, created safety hazards. Almost always, they noticed problems developing but weren't sure when to act. They wish they'd called sooner. Based on what we've seen throughout St. Paul's neighborhoods, retaining walls show warning signs before catastrophic failure. Knowing what to look for helps you address problems while repair might still be possible, or plan for replacement before you're dealing with an emergency. St. Paul's Aging Walls Many St. Paul neighborhoods have retaining walls built 50, 60, even 75+ years ago. We work on walls throughout Summit Hill, Macalester-Groveland, Highland Park, St. Anthony Park, and Como Park constantly. These established neighborhoods are full of aging walls that have been holding slopes for decades. Older walls were built with different standards and techniques than we use now. Some were built incredibly well and still function fine. Others are showing their age and need attention. Age matters, but construction quality and drainage matter more. Sign #1: Your Wall Is Leaning Forward A leaning retaining wall is the clearest sign something is seriously wrong. The wall tilts toward you, past vertical. The top is further forward than the base. Sometimes you can see a gap developing between the wall and the soil it's supposed to retain. We've seen walls throughout St. Paul lean 6 inches, 12 inches, even more before homeowners called us. Once leaning starts, it accelerates. The wall gets worse faster as it tilts further. Why walls lean: The wall wasn't designed to hold the load it's retaining. Water damage behind the wall is causing erosion and pressure. The foundation was inadequate. Drainage systems are missing or failed. Water is almost always part of the problem. We've assessed countless leaning walls throughout St. Paul. When we excavate behind them, we consistently find missing drainage or no drainage system at all. The Fix: When a wall is leaning, it almost always needs rebuilding. Repairs rarely work because structural integrity is compromised. You can't just push a leaning wall back and expect it to hold. We rebuild with proper drainage - perforated pipe in gravel backfill, filtration fabric, proper weep holes. Likely the original wall wasn't designed properly, so we re-engineer with correct block sizes and geo-grid reinforcements if needed. Build it right so it lasts your lifetime. Sign #2: Concrete Block Walls Are Cracking or Crumbling Concrete block retaining walls showing cracks or crumbling blocks indicate structural problems. We mean visible cracks running through blocks, blocks breaking apart, pieces falling off the wall face, deterioration that's actively getting worse. When blocks are cracking or crumbling, there's likely water damage behind or at the base of the wall. Water gets behind the wall, saturates the blocks, freezes in winter, and breaks down the concrete from inside. We've excavated behind cracked block walls in St. Paul and found completely saturated conditions with no functional drainage. When blocks are cracking, it's not just cosmetic - the wall's integrity is compromised. The damage will continue getting worse. We've seen walls where a few cracked blocks turned into sections of wall failure within a year or two. The Fix: Sometimes we can fix by solving the drainage issue and replacing damaged blocks. This works when damage is limited to 10-20% of the wall and the structure is otherwise sound. More extensive damage usually means rebuilding makes more sense. If a third of your blocks are cracked, you're looking at extensive repair costs on a fundamentally compromised wall. Rebuilding with proper drainage creates a better long-term solution. Sign #3: Wooden Walls Are Rotted and Deteriorating Timber retaining walls eventually rot. Even treated lumber fails when it's constantly in contact with soil moisture and dealing with Minnesota's wet-dry cycles. We see rotted wooden walls throughout St. Paul - some 20 years old, some that lasted 40 years. Wood rot looks like soft boards when you press on them, visible decay, sections crumbling. Often the rot is more extensive than it appears from outside. The problem with assessing wooden wall repairs is you can't see the extent of damage until you get into the wall. We've started what looked like straightforward repairs and found the deterioration was much worse once we opened things up. The Fix: If the wall's structure is sound and rot is genuinely limited to a small percentage of boards, replacement of rotted sections can work. But be prepared for finding more problems once you start. At KG Landscape, we build retaining walls out of stone and segmental block that won't rot like wood. Stone provides a much longer lasting solution. When you're already investing in addressing a failing wall, building with materials that eliminate the rot problem entirely makes sense. Sign #4: Soil Sediment Leaching Through the Wall If you see soil or sand running through your retaining wall and piling at the base in front, you're looking at active erosion behind the wall. Material comes through the wall face, creates staining, clogs weep holes, and creates growing piles at the wall's base. This indicates significant drainage issues. Water flows through the wall carrying soil with it. The problem is twofold - water creates pressure, and erosion removes soil support from behind the wall. Voids form as soil washes away. The wall loses support. The problem accelerates as erosion creates bigger pathways. We've seen this on walls built without filtration fabric. Water moves through, picks up soil, carries it through, and deposits it at the base. Over time, substantial soil gets eroded from behind the wall, creating stability problems and eventual wall failure. The Fix: When we build new walls, we install filtration fabric behind the wall and a 12-inch wide strip of 3/4-inch drainage rock. This manages water without eroding soil. On existing walls showing sediment leaching, sometimes we can fix this by addressing drainage behind the wall without rebuilding. Other times, erosion has created such voids that rebuilding makes more sense. We assess each situation. The key is addressing it before erosion causes wall failure. Sign #5: Your Wall Is Just Really Old Sometimes retaining walls have simply reached the end of their functional lifespan. A really well-built wall may last 50 years or more. Many walls we see throughout St. Paul's established neighborhoods are well over 50 years old. Some are over 75 years old. These walls have served their purpose for a long time. We work on walls from the 1940s, 1950s, 1960s, and 1970s in these neighborhoods. Some are incredibly well-built and still functioning. Others have failed or broken down because materials deteriorate, construction standards were different, and walls weren't designed for current conditions. When age becomes the primary issue, you're looking at a wall that's served its time. Materials deteriorate regardless of maintenance. Mortar breaks down. Blocks weather. Even stone walls can reach a point where rebuilding makes more sense than continuing to patch aging components. The Advantage: Modern replacement means current engineering standards, better materials and construction techniques, improved drainage systems, and geo-grid reinforcement when needed. We build walls designed to last 50+ years with proper maintenance. If your wall is 50, 60, 70+ years old and showing multiple issues, it's time to think about replacement rather than ongoing repairs.