
How to Get Your Outdoor Living Space Right the First Time
Outdoor Living in the Greater Twin Cities Area
If you're thinking about adding an outdoor living space to your home, you've probably got a lot of questions. Where should it go? What materials make sense? How do you deal with a sloped yard or drainage issues?
These are the kinds of things we work through with Twin Cities homeowners every week. This guide covers the key considerations that go into a successful project, with examples from two recent builds in the metro area.
How Will You Actually Use the Space?
A lot of homeowners come to us with ideas about materials or layout, but the first thing we want to know is how you're actually going to use the space.
Are you hosting big dinners? Do you want a quiet spot for morning coffee? Do your kids need somewhere to hang out with friends? Is a fire pit a priority?
When our clients walk through the yard with us, they often have different priorities. That's fine. We just need to know about all of them upfront so we can design something that works for everyone.
Once we understand how you want to use the space, we draw everything to scale. The dining table, lounge chairs, grill, fire pit. All of it goes into the plan at actual size so you can see if everything fits before construction starts.
Some examples of what we plan for: an appropriately sized dining table, an area for grilling, a lounge set, and a fire pit or fireplace. These features are drawn in to scale to ensure everything fits nicely together.
Where Should Your Patio Go?
Most people have a spot in mind when they call. Usually it's the flattest area, closest to the back door. Sometimes that's the right call. But not always.
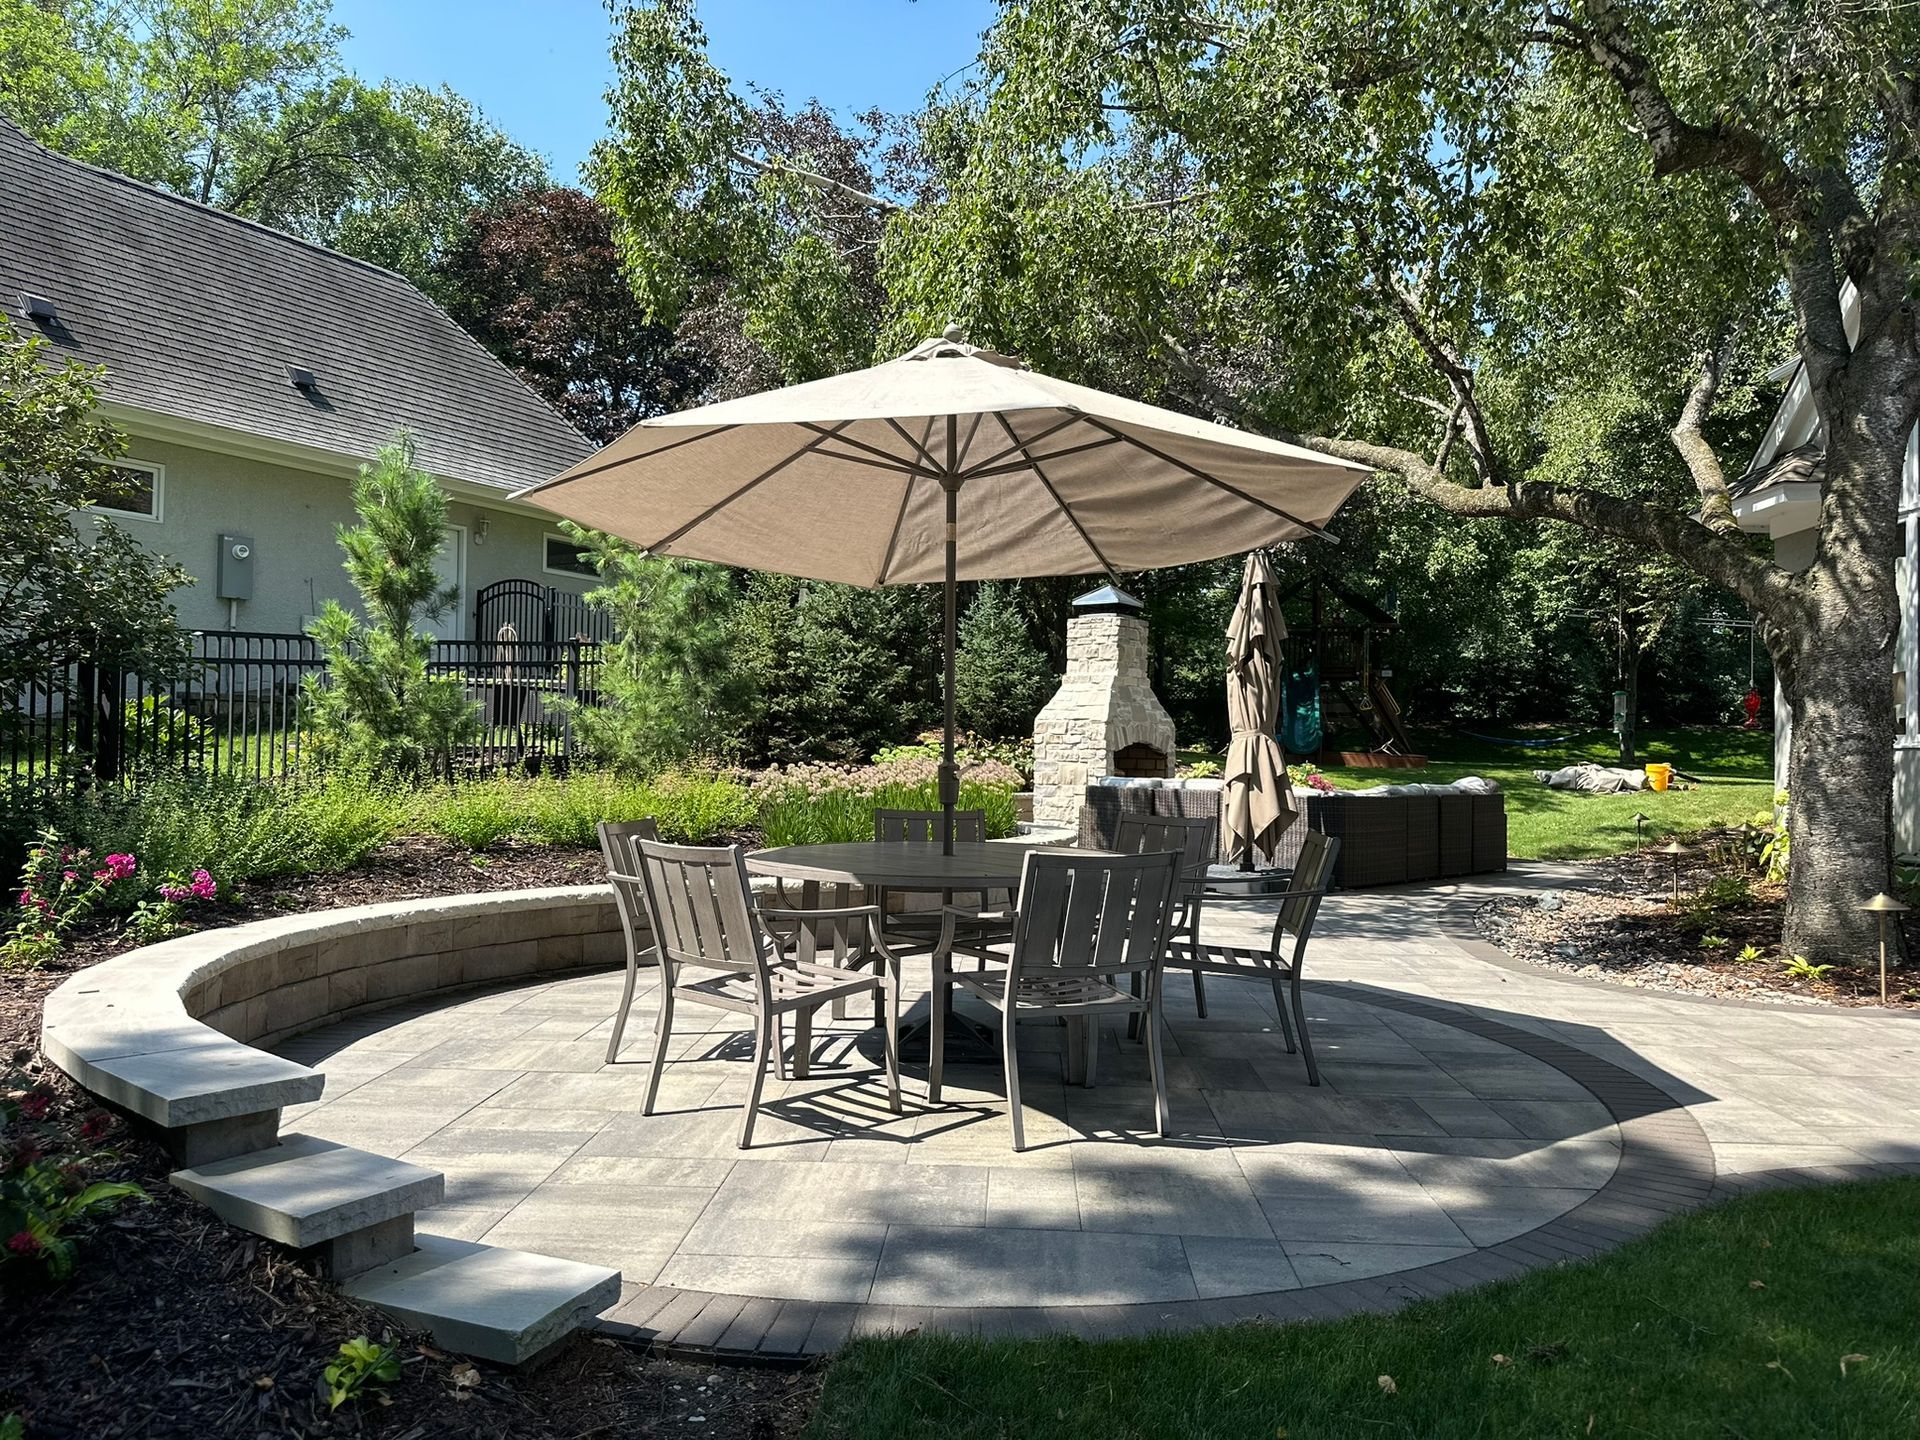
We worked on a project in Minnetonka where the homeowners had basically written off their backyard. It was narrow, maybe 30 to 40 feet to the property line. There was a hill sloping toward the house and a drainage swale cutting through the middle, carrying water from the neighbors uphill. That swale ran from west to east, right where we ended up building the patio.
They figured that area was unusable. It turned out to be the best spot.
The slope allowed us to create different zones at comfortable levels. Once we dealt with the drainage properly, it wasn't going to be a problem again. And the narrow depth actually helped because it made the finished space feel cozy instead of exposed.
The other factor they hadn't considered was the view from inside. Their kitchen, living room, and dining room all have picture windows facing that part of the yard. For years, those windows looked out at a drainage ditch and a slope. Now they look out at a designed space with a fireplace as the focal point. Creating a beautiful scenic landscape to look out from was actually a priority for them, and the new outdoor living space delivered that.
If there are a few possible spots for your patio, we'll walk you through the tradeoffs of each. Sometimes the best option is the part of the yard you've been ignoring.
Drainage Matters More Than You Think
Nobody gets excited about drainage. But here in Minnesota, getting it right is the difference between a patio that holds up for decades and one that cracks, heaves, or floods in a few years.
Our freeze-thaw cycles are hard on hardscape. Water gets into small cracks, freezes, expands, and causes damage. If water is pooling on your patio or flowing toward your foundation, you're going to have problems.
We handle drainage as part of the design process. Here's what we're looking at: the patio surface needs to drain properly. The patio can't block the flow of drainage from adjacent yard spaces. Water needs to be sent away from your house. And everything has to work with the overall drainage plan for your property.
That Minnetonka project was a significant drainage job. We installed a dry creek bed between the patio and the house. It looks like a natural feature, but it's actually moving water away from the foundation. On the uphill side of where the old drainage swale used to run, we put in underground drainage with catch basins. Water gets collected, routed through pipes below the patio, and released safely on the other side.
Because of that extensive drainage work, we were able to convert an unused space into a functional backyard gathering area. The homeowners don't think about any of this anymore. They just have a nice outdoor space where there used to be a drainage problem.
More information on how we handle these situations is available on our outdoor drainage services page. The University of Minnesota Extension also has good resources on managing water on residential properties.
Layout and Flow
Once drainage is addressed, we move into layout and flow.
Some people want clean straight lines and rectangular shapes. Others prefer curves and softer edges. Either works. It comes down to what feels right with your house and what you prefer.
We typically provide several concept designs that include different shapes and sizes for you to consider. It's easier to react to something real than to try to picture it in your head.
Beyond shape, flow matters. Natural and unobstructed movement within and through your patio space is essential. The space should connect naturally to your back door, to the lawn, and to other areas of the yard.
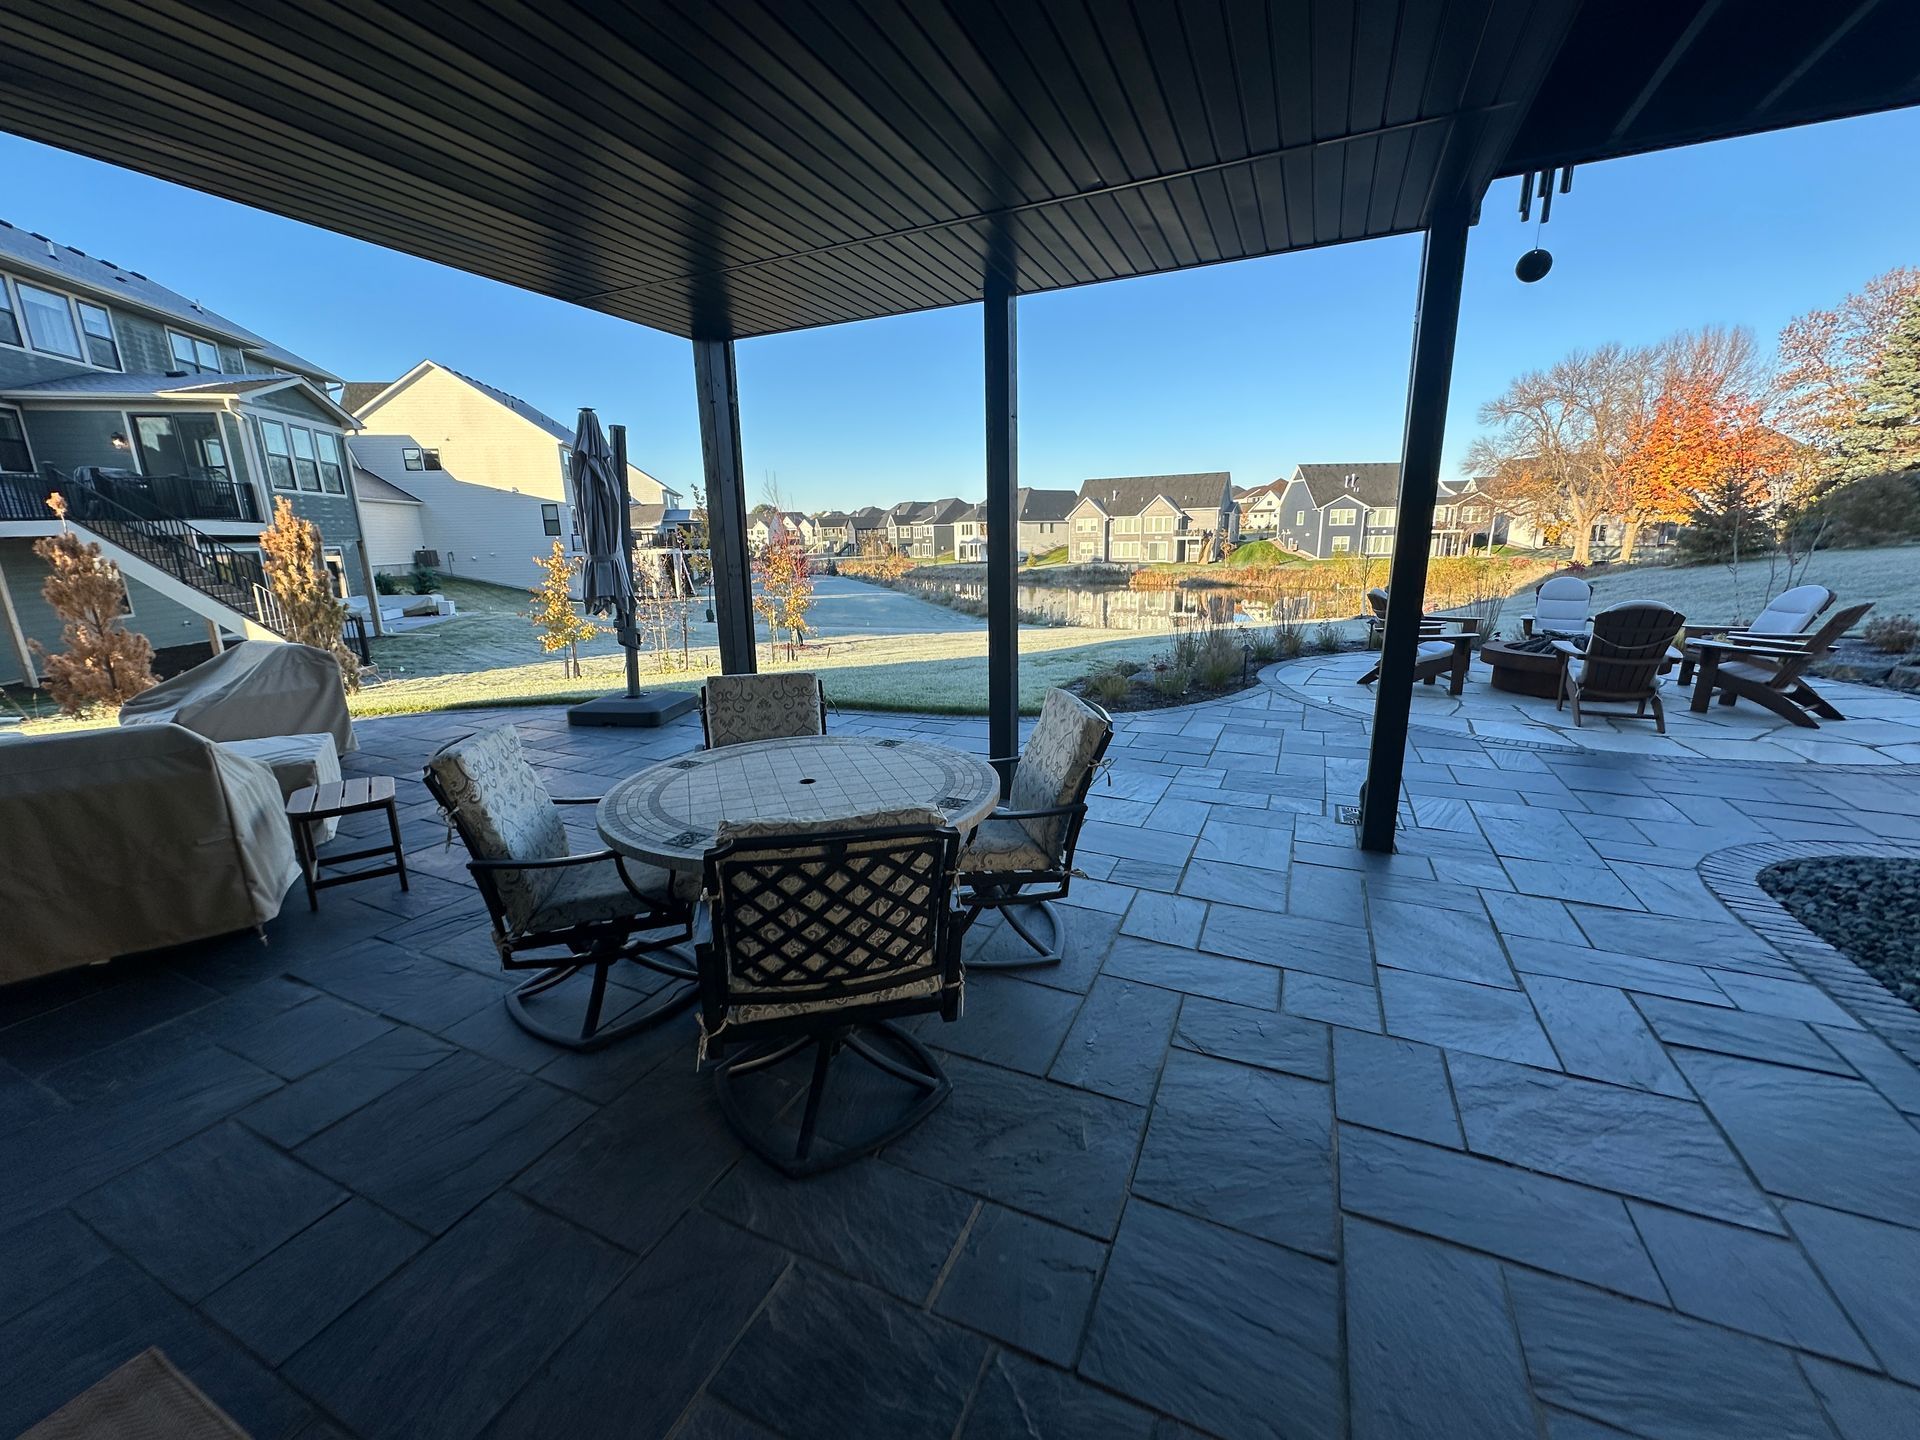
Flow gets more interesting when you're creating multiple zones in one patio. We worked on a project where the homeowners had a walkout basement with a three-season porch and deck above. The yard sloped downhill into the backyard.
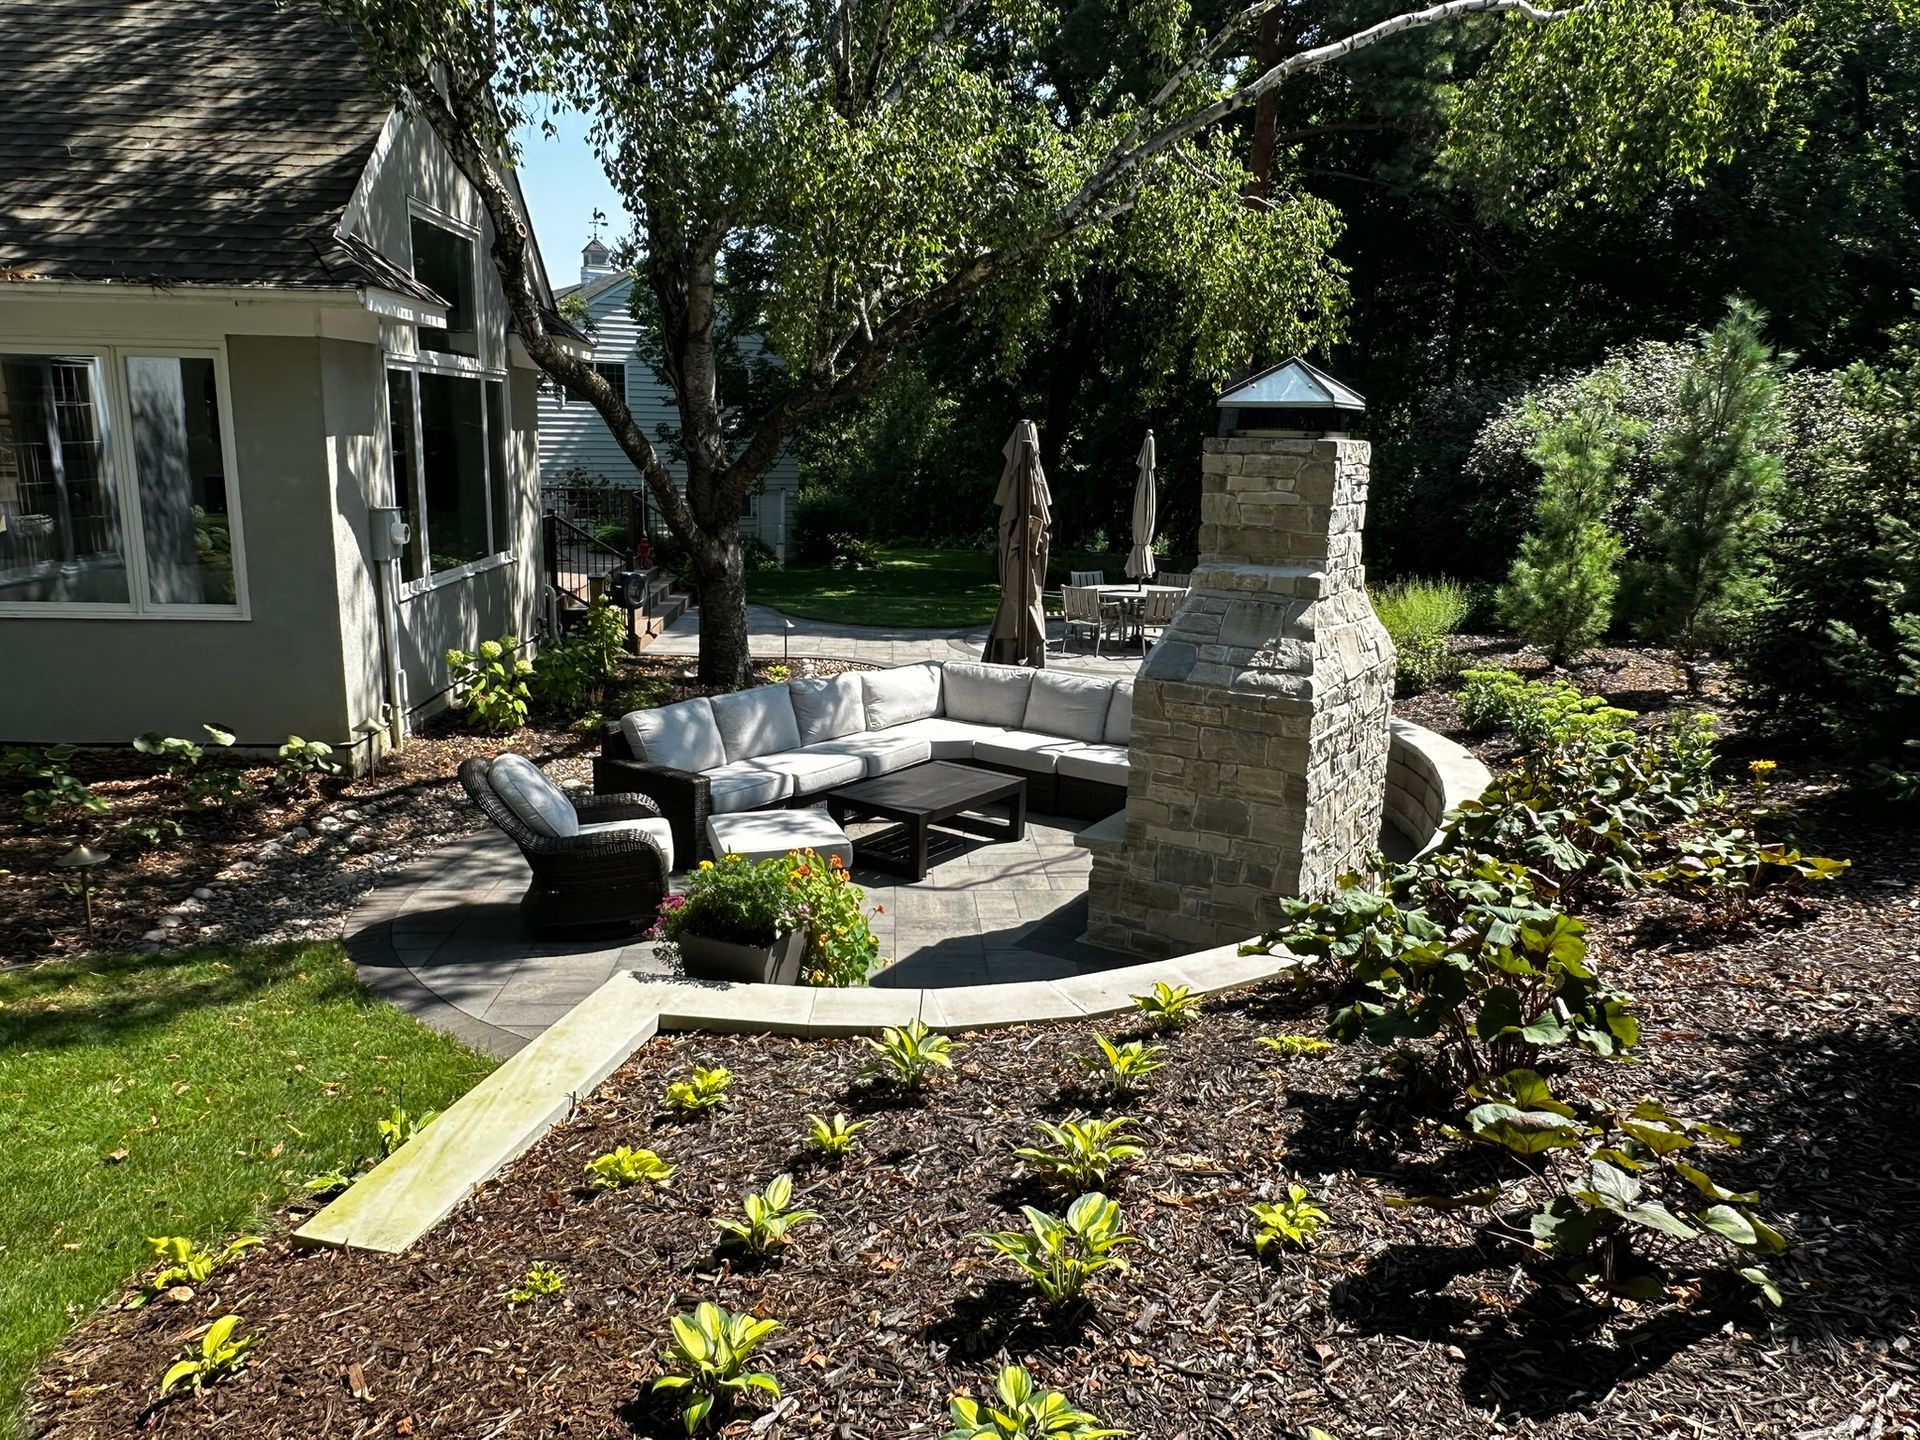
We were able to maximize the space below that three-season porch and deck. Under the porch, we created a dining area that's fully covered and protected from rain. Just to the south, where the sun hits, we placed the lounge area. Beyond that, we built a raised circular section with a fire feature.
Building the raised patio on the unused downhill sloping portion, directly adjacent to the flat area by the sliding door, allowed for a single level patio throughout. No step-ups or step-downs between the dining area, the lounge, and the fire pit. That kind of seamless flow makes a real difference in how the space gets used.
Choosing the Right Materials
This is where many homeowners get stuck. There are a lot of options. Natural stone, flagstone, concrete pavers in various colors and patterns. It's difficult to know what's going to look right.
We start by looking at your house. What's the siding? What colors are in the trim and roof? Is it traditional, modern, or somewhere in between? Our designers provide insights to help you select a natural stone, flagstone, or paver material that works best for you. We advise on which materials, colors, and styles fit with your home and preferences.
That project with the three zones is a good example. The house has black siding, a bold, modern choice. Standard gray pavers would have felt off. We used black natural stone flagstone cut in a pattern that matches the black siding. It's unique and on trend.
The patio doesn't compete with the house. It extends the same look into the landscape.
Beyond aesthetics, different materials hold up differently in Minnesota's climate. Natural stone is very durable and tends to look better with age. Pavers offer more options and are easier to repair if something cracks. We help homeowners weigh these factors based on what matters most to them.
More information on material options is available in our paver selection guide. The Masonry and Hardscapes ICPI Foundation is another good resource for understanding paver standards.
Privacy and Views
You want to be able to relax on your patio, not feel like the neighbors are watching.
There are several ways to create privacy. Screen plantings can block views of neighboring properties or soften views of a garage or other structures. Features like a pergola, decorative planting beds, or sitting walls around a patio space can create a more intimate feeling within a larger backyard.
While thinking about what to screen, we're also thinking about what you want to see. We design seating areas to face desirable views. Your lounge and dining spaces should look out at the yard, not at a fence or the back of the house.
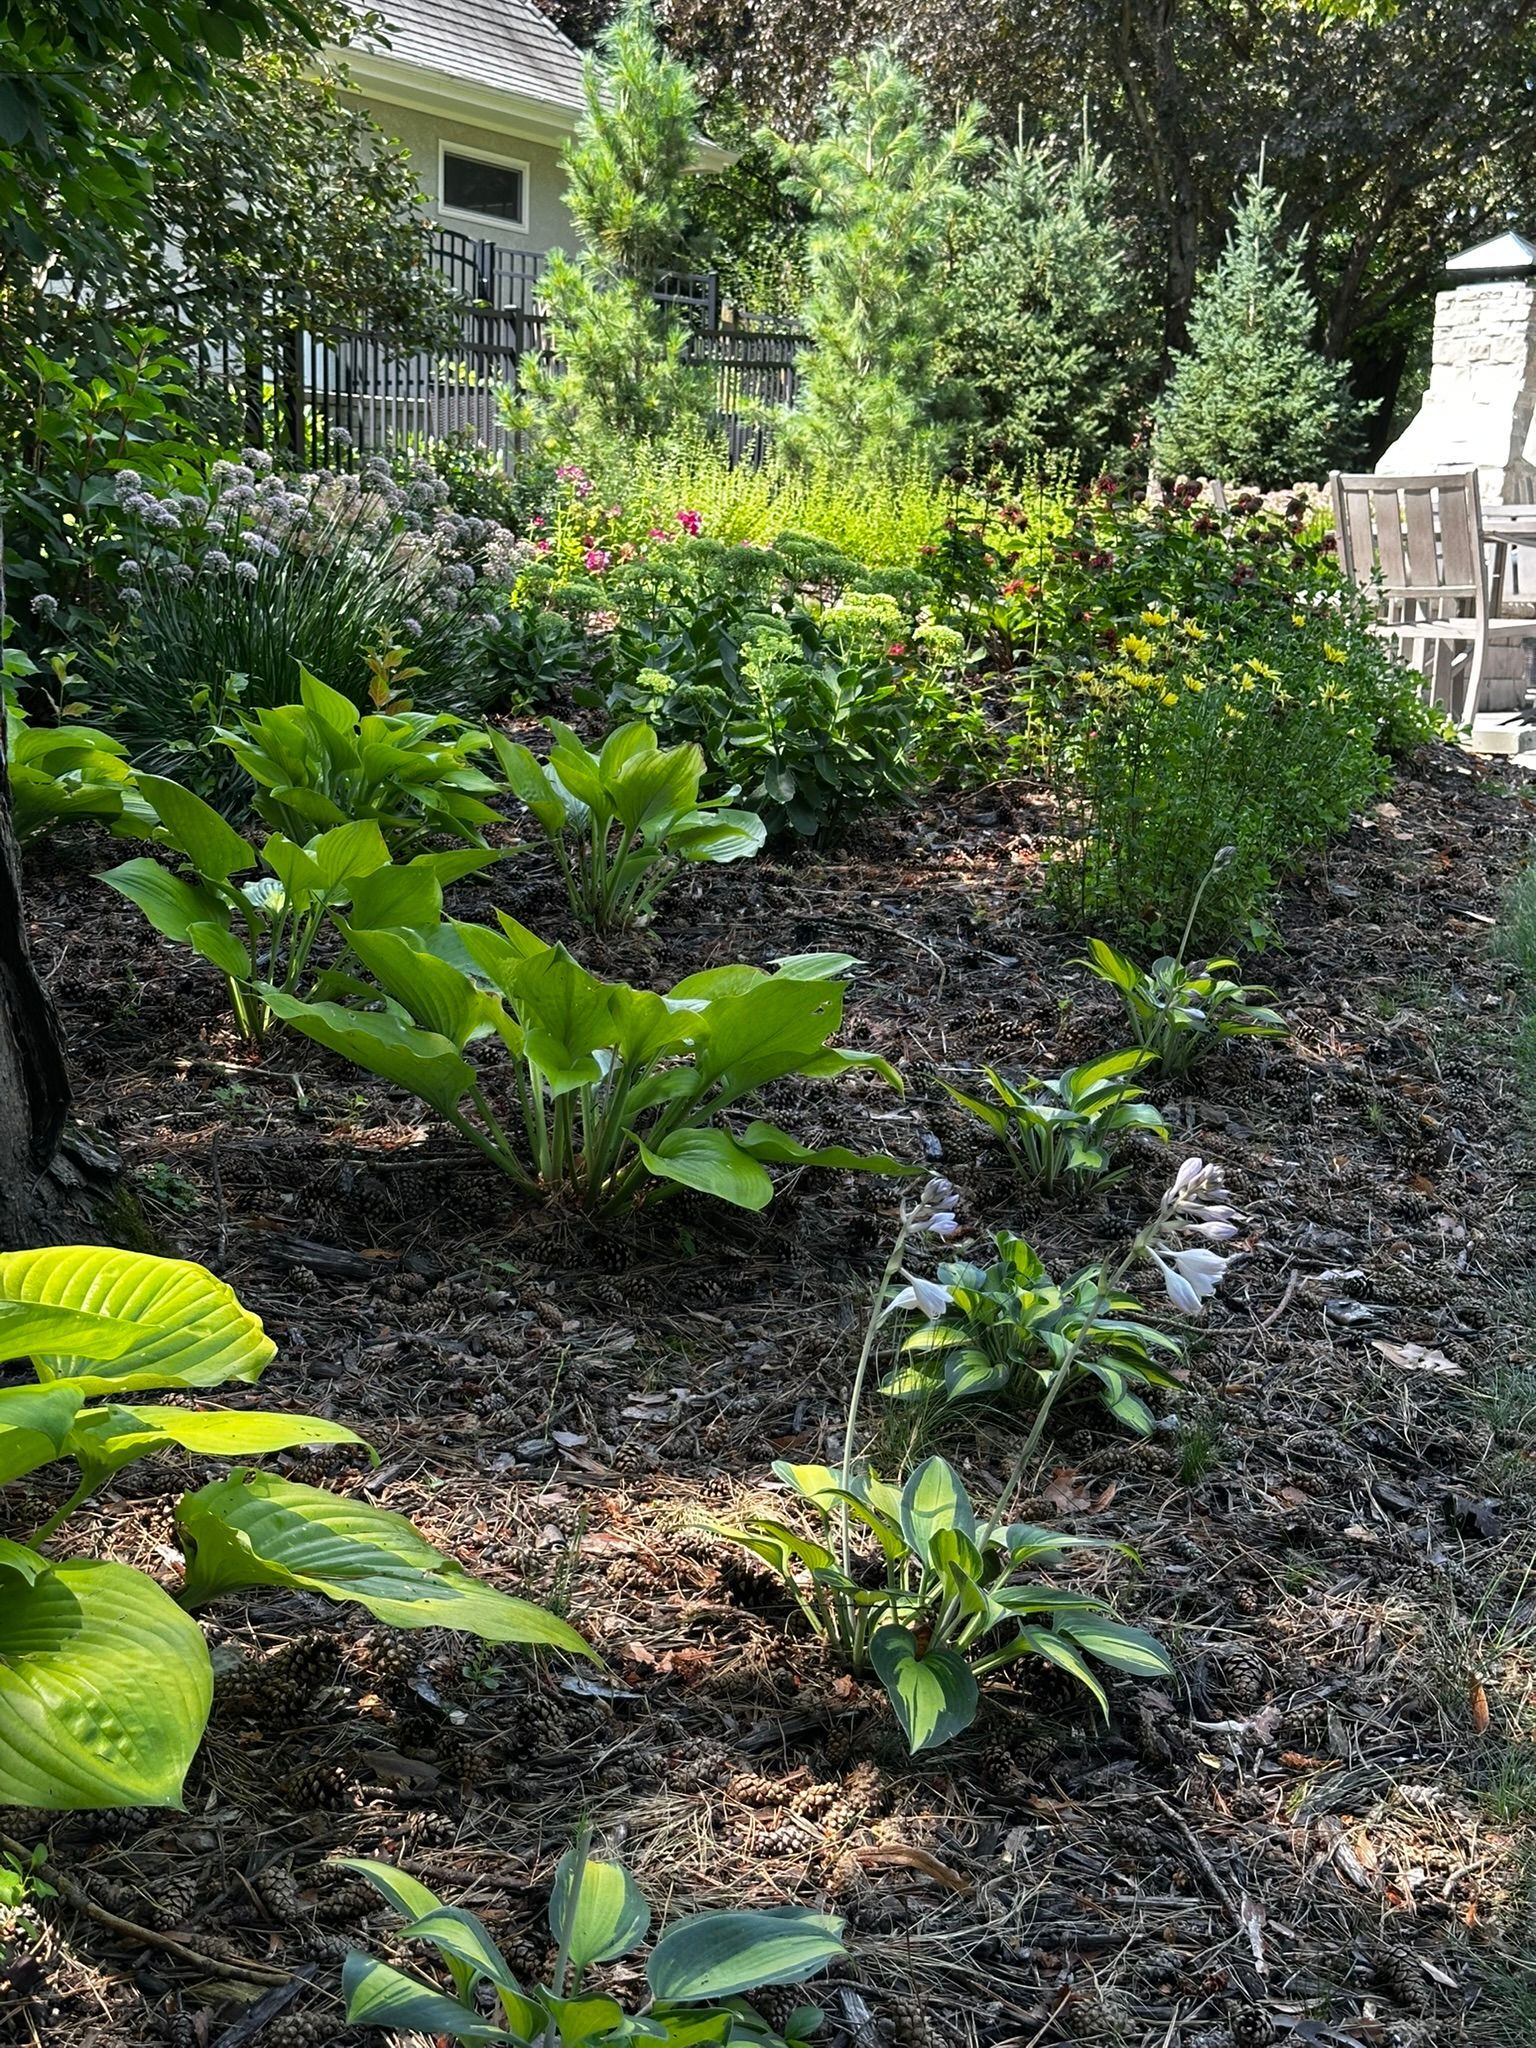
We also design planting beds, stone walls, and other features to add visual interest around the outdoor space.
In that Minnetonka project, the view from inside the house mattered as much as the view from the patio. Those picture windows used to look out at a drainage swale. Now they frame a fireplace and plantings that look good even in winter.
If overhead enclosure is something you're considering, our pergola construction page has more information. The American Society of Landscape Architects also has resources on residential landscape design.
Fire Pits and Fireplaces
A fire pit or fireplace tends to become the spot where everyone gathers. Conversations go longer. People stay outside later than they planned.
Fire pits are more casual and allow seating all around. Fireplaces make more of an architectural statement and direct heat toward you, which is useful when extending into cooler weather.
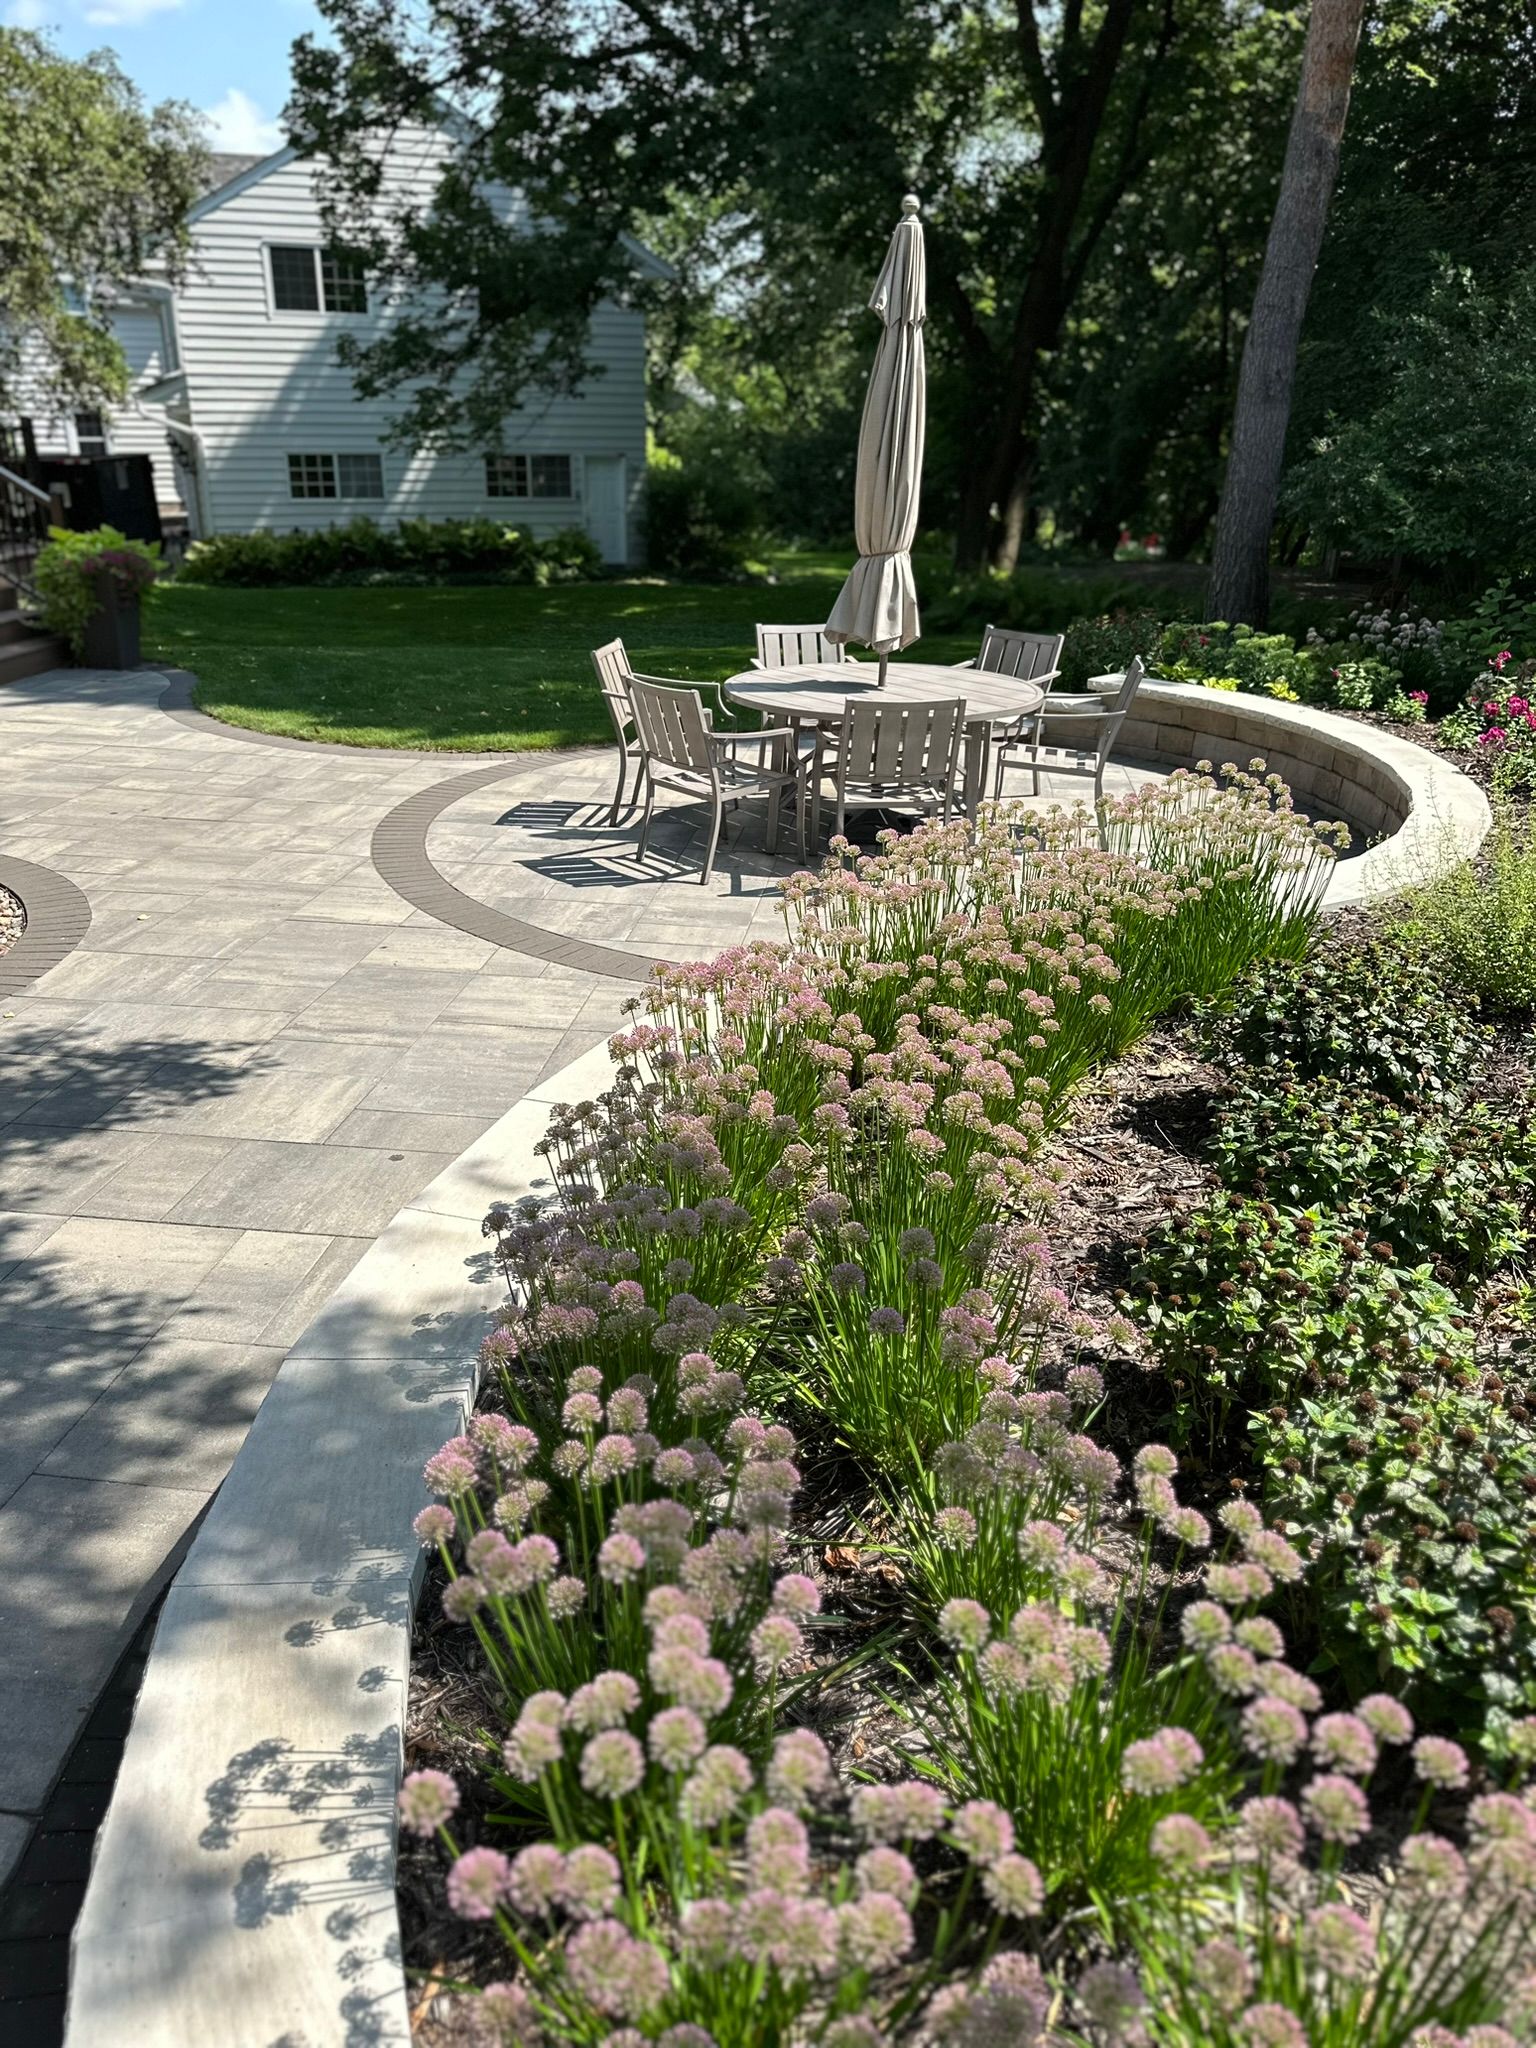
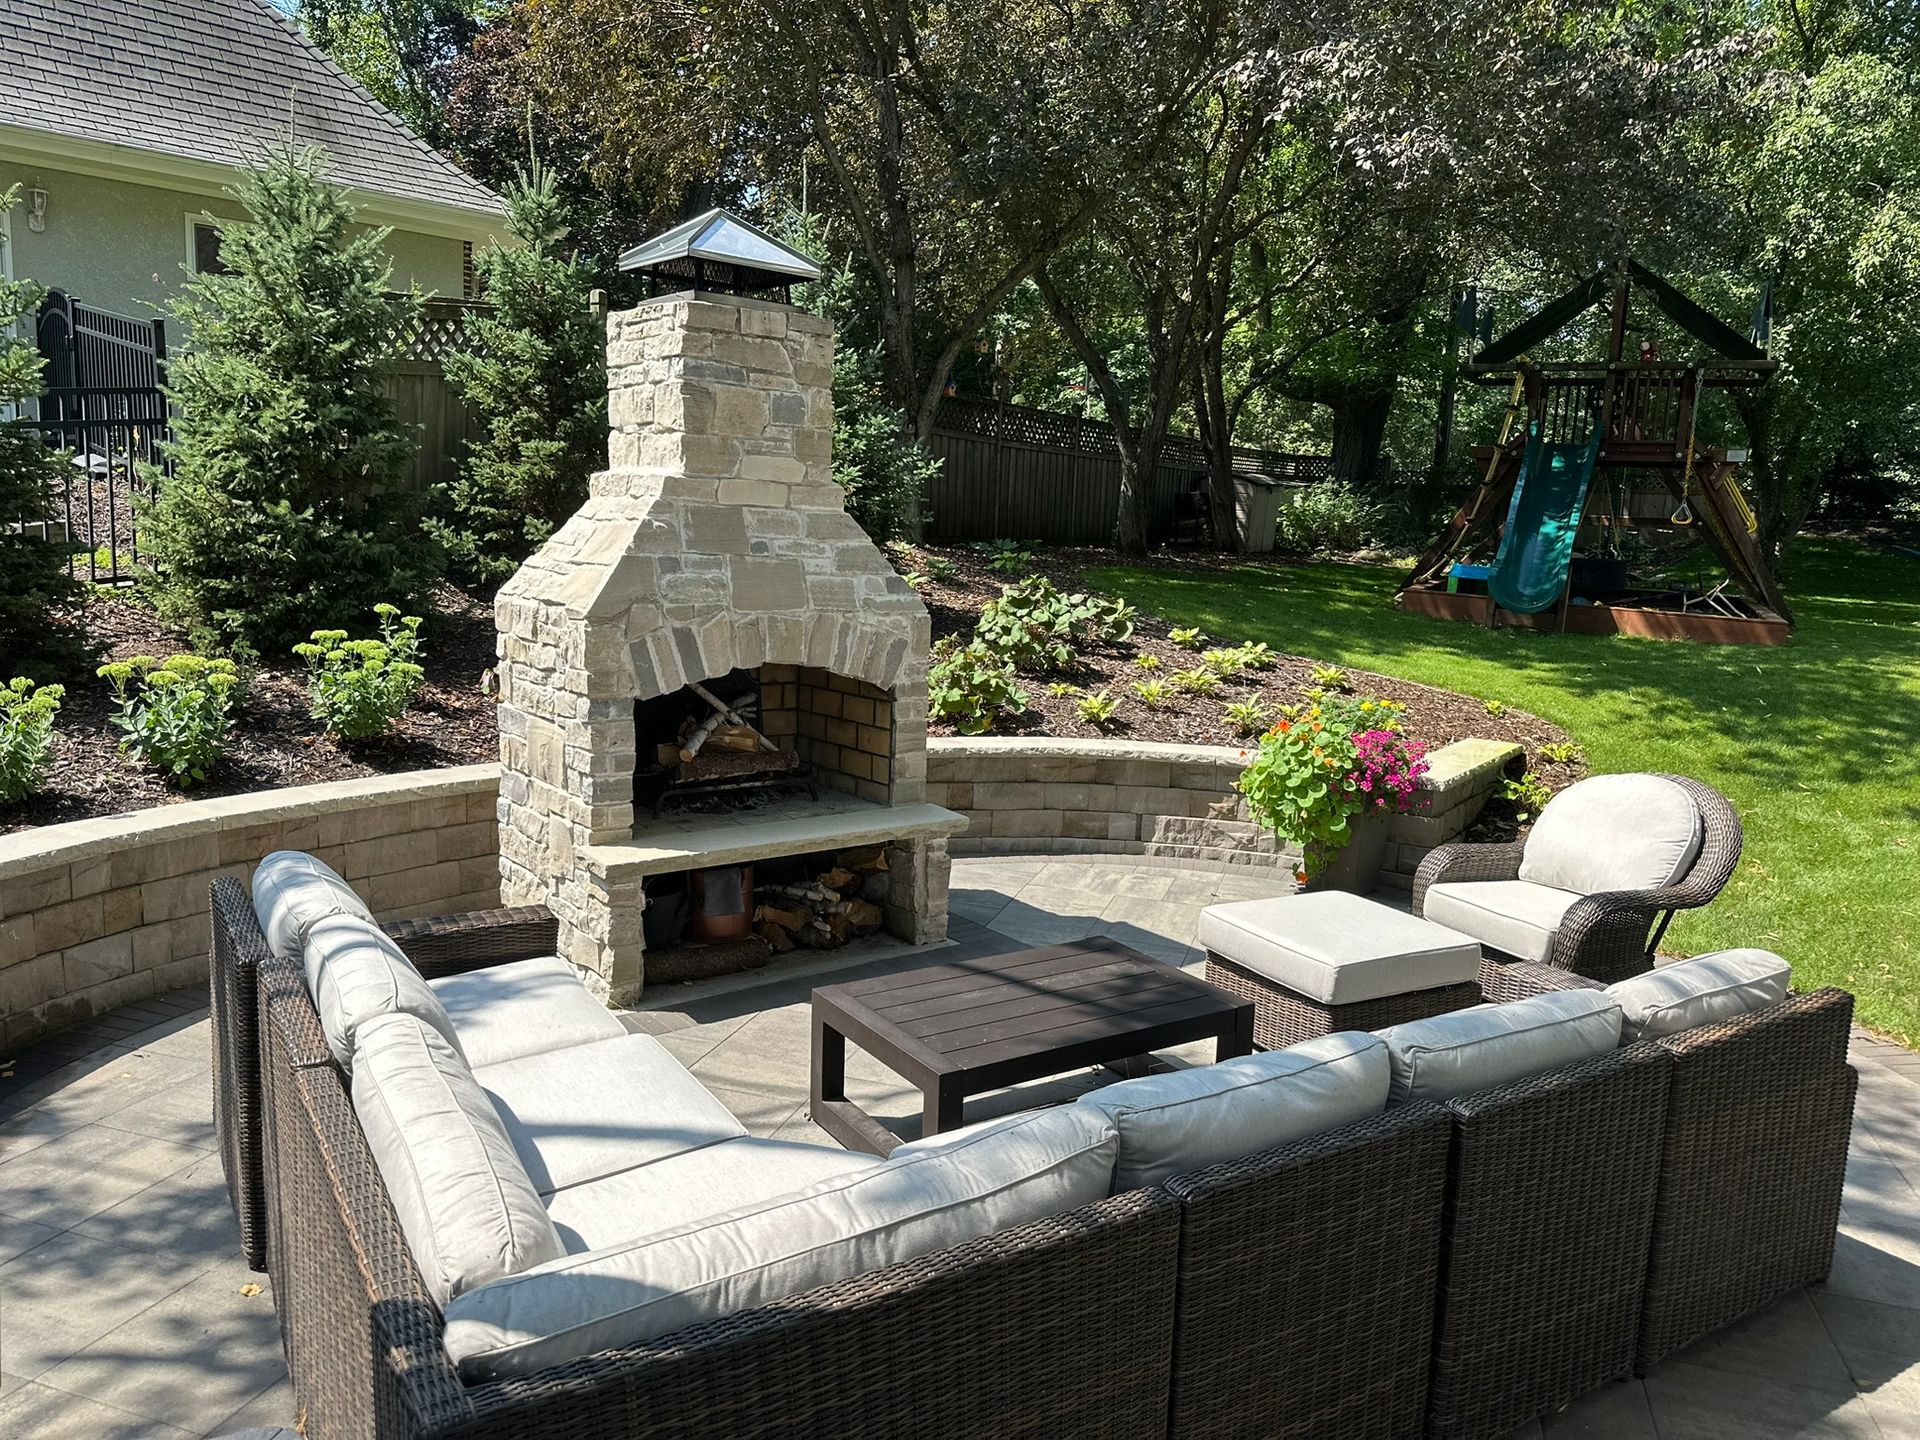
In the Minnetonka project, we installed an outdoor fireplace with a chimney. It anchors one end of the patio and serves as the focal point from the picture windows inside. The space includes lounge seating, outdoor seating for family and guests, and a dining area with a circular inlay designed to match their table.
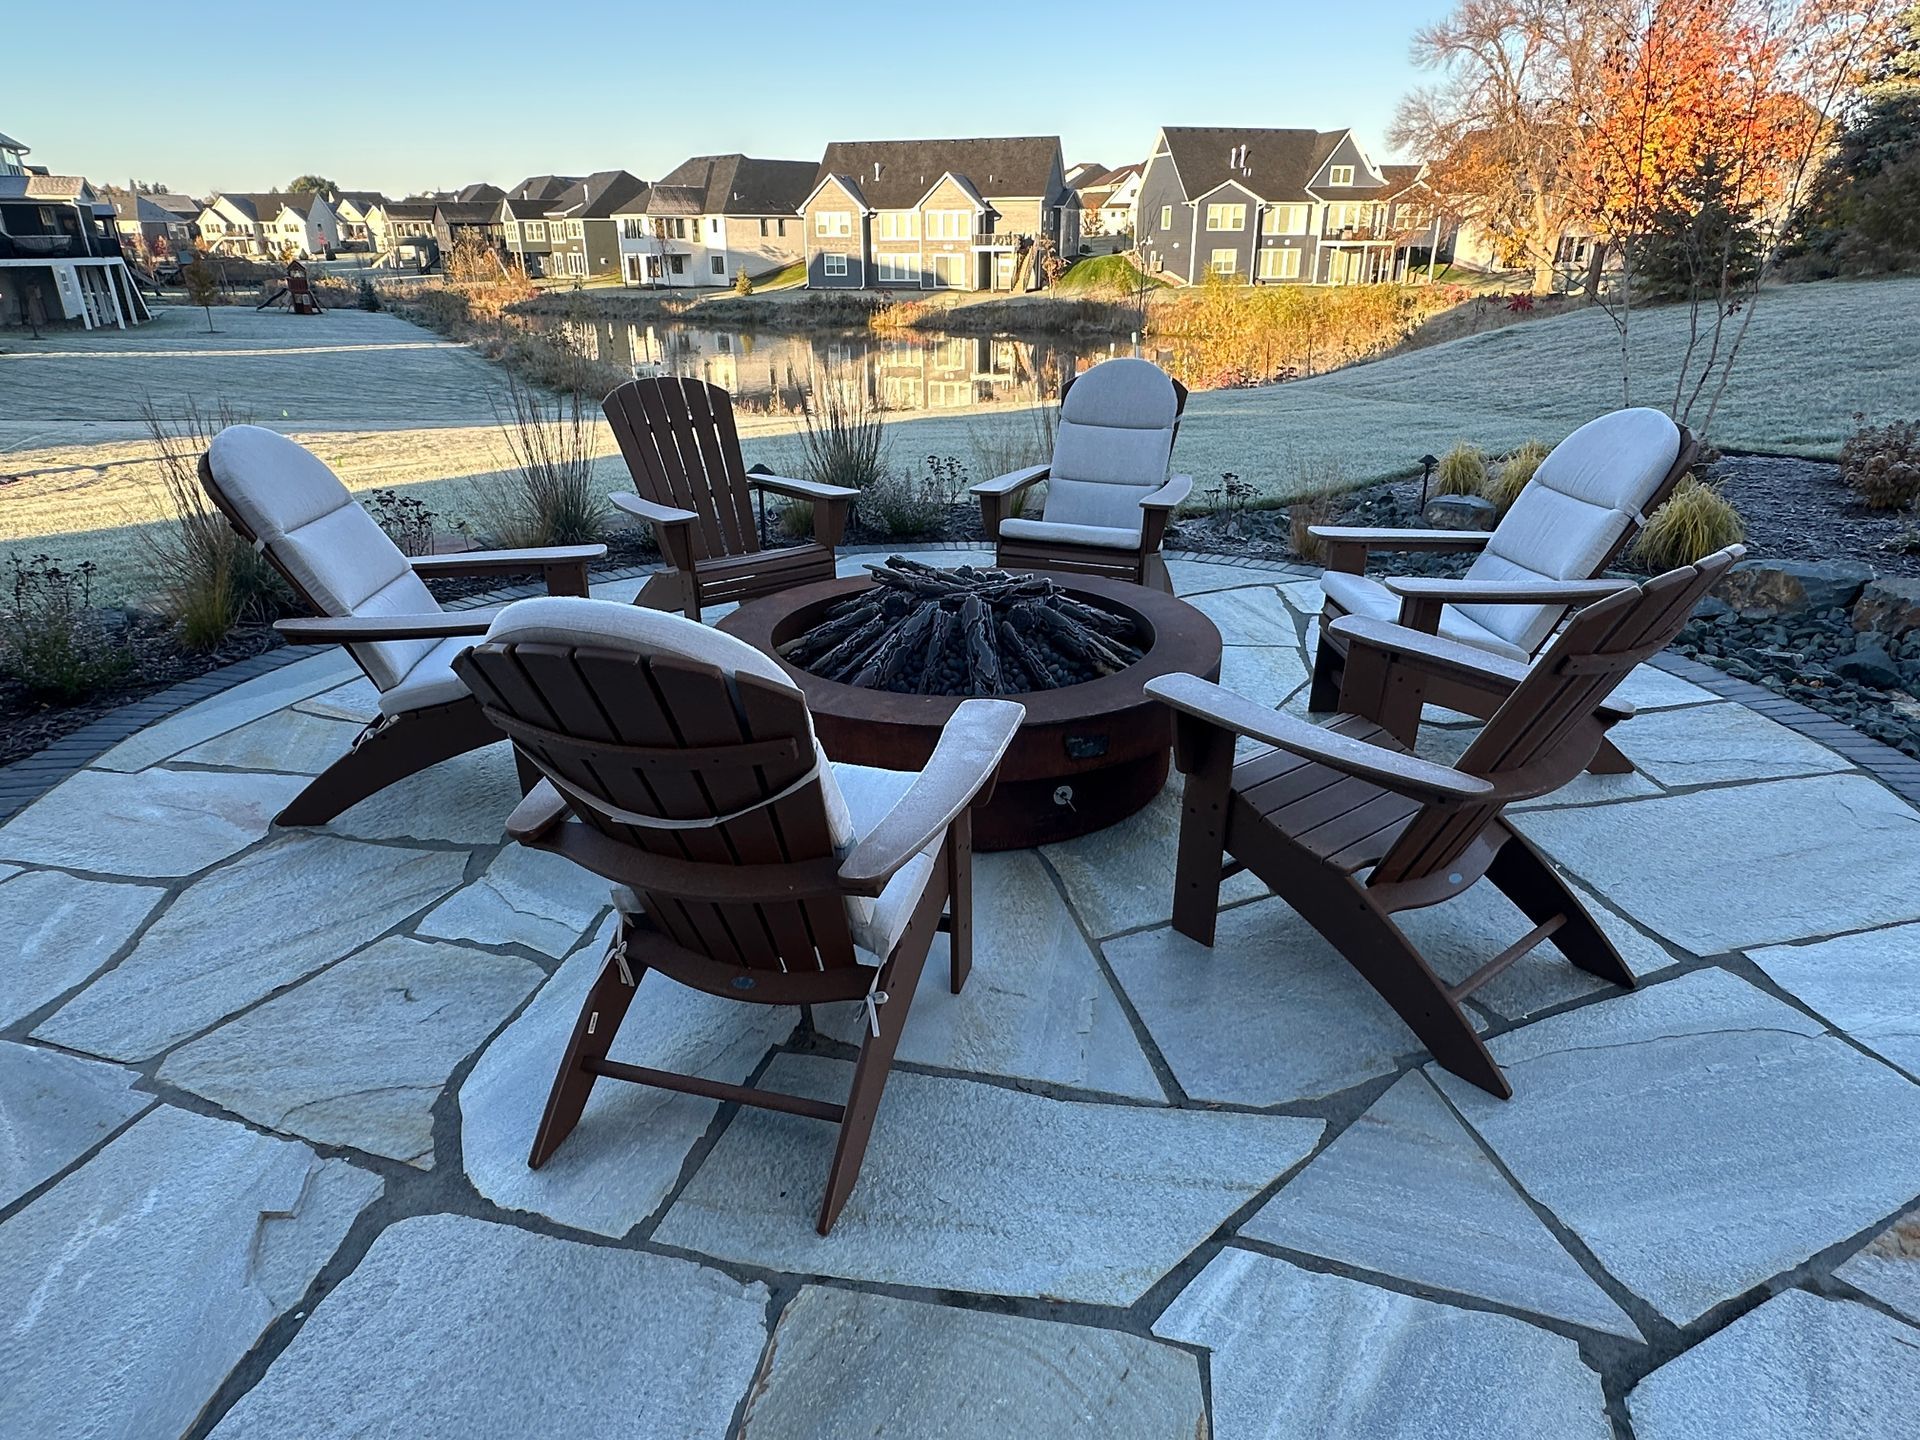
The other project took a different approach. We built a raised circular platform out of the same black natural flagstone and installed a custom gas fireplace in the center. The raised section creates a distinct destination within the larger patio. Gas means no firewood or ash to deal with.
Both approaches work well. What matters is treating the fire feature as a destination, not an afterthought.
If you're planning to use your patio after dark, landscape lighting makes a significant difference.
How the Design Process Works
We've covered a lot here. Function, location, drainage, flow, materials, privacy, fire features. You don't need to have all of this figured out before reaching out. That's what the design process is for.
When I works with homeowners, I develop concept designs, typically several options, so you can see real possibilities for your space. These aren't rough sketches. Everything is drawn to scale. Drainage is accounted for. Materials are suggested based on your home.
By the time construction starts, you've already seen what you're getting and had the chance to make adjustments while changes are still easy.
More information on our approach is available on the landscape design process page.
Ready to Discuss Your Project?
Every backyard has potential, sometimes in unexpected places.
A well-designed outdoor space isn't just an addition to your home. It's where summer dinners happen, where friends stay late around the fire, where your yard finally gets used the way you always imagined.
If you're in the Minneapolis-St. Paul area and thinking about what your outdoor space could become, we'd like to hear about it.
Contact us to start the design conversation.
Frequently Asked Questions
How long does an outdoor living space project take from start to finish?
It depends on the scope. A straightforward patio takes less time than a larger project with multiple zones, drainage work, and custom features. We schedule construction based on workload and weather. Minnesota's climate gives us a defined building season, so if you want your project done by early summer, it helps to start the design conversation in winter or early spring.
When should I start planning a patio project in Minnesota?
Late winter is a good time to begin the design process. It allows time to work through concepts before the ground thaws and construction season begins. We design year-round, and fall is also a good time to build. The weather is typically cooperative and you'll have your space ready for the following spring.
What if I have trees or existing landscaping in the way?
We address this during design. Mature trees are often worth keeping since shade over a patio is valuable. If a tree is in a difficult spot, we decide whether to work around it or remove it. Existing plants in good condition can sometimes be transplanted. We work through all of this before construction starts.
Can you build on a sloped yard?
Yes. Some of our best projects have been on challenging terrain. Slopes give us more options. We can create tiers, build in seating walls, and work with the natural grade in ways that flat yards don't allow. The Minnetonka project referenced throughout this article is a good example. What looked like an unusable slope became the best part of their property.
How do I choose between pavers and natural stone?
Pavers are manufactured, so they're consistent in size and color. They tend to cost less than natural stone and individual pieces are easier to replace if something cracks. Natural stone is quarried, so every piece is unique. It costs more and takes more labor to install, but it holds up extremely well and looks better with age. The choice often comes down to the style of your home, your budget, and personal preference. We help homeowners think through these tradeoffs.
About the Author
Kent Gliadon is the owner and principal designer at KG Landscape, a Minneapolis-based landscape design and build company serving homeowners across the Twin Cities for over 20 years. Kent studied landscape architecture and earned a bachelor's degree in Environmental Horticulture at the University of Minnesota, with emphasis in turf science and landscape design.
Ready to Start on Your Next Project?
Call us at (763) 568-7251 or visit our quote page.


