10 Maintenance Tips for Landscaping Lights During the Winter
Fall is closing out, and the days are getting shorter. This time of year is when we start to batten down the hatches and tuck away for the winter.
A big part of getting ready is landscape lights winter maintenance. This lighting is much more important now that people may come and go from your house while it’s dark; you’ll want to make sure your winter landscape lighting
is in tip-top shape.
Here are ten simple ways to make your home shine bright this winter.
1. Clean the Lights
Many times your lights will appear dim, and they might not even look like they’re working at all. Luckily, this is an easy fix. All you need is a good scrub down of the light, and you’ll be good to go. Many different factors can impact the brightness of your lights:
You’ll want to ensure there is no power running to the lights when you clean them. Check inside for any stinging insects that may call the light home. Once the coast is clear, take a standard glass cleaner and give the exterior and interior of the light a wipe down. Clean out any spider webs or dirt that may have worked its way inside the fixture as well.
2. Change the Bulbs
Another essential part of outdoor lighting maintenance
is checking the bulbs on your fixtures. If you live in a place that gets cold, often you’ll experience this problem even more. Extreme temperatures cause the bulbs to wear down quickly.
When one or two bulbs burn out, you’ll notice that the other lights burn out quicker as well. That is because they all rely on the same power source, so the new bulbs will receive more voltage, causing them to run hotter.
You can consider switching to LEDs because they’ll last around six years longer, and they are more cut out for cold weather lighting.
3. Inspect Each Light
As we said before, it’s important to understand the point and purpose of your outdoor landscape lighting. These lights are here to illuminate a pathway that likely leads to your front door, garage, backdoor, etc.
You need to make sure these are working at all times while we’re living in the dark of winter. Take a walk around your property after dark and check out the fixtures. Sometimes if you’re noticing dark patches along your walk, it might mean that something has fallen out of place, tipped over, got buried by something, and so on.
Scan all your landscape lights and fix any that may have lost their place during the warm weather months.
4. Consider an Upgrade
Landscape lighting in the snow
is a beautiful sight, but it’s not if your fixtures are cracked, broken, or so dim you can barely see them. Every now and then, it’s good to upgrade your landscape lights so you can keep up to date with the advances in technology.
Some homeowners even swap their landscape lights with the seasons. They’ll use a cast bronze in the winter because it is more durable and better at preventing corrosion.
Either way, if your lights are cracked or damaged, and they’re becoming an eye-sore rather than a luxury, consider upgrading to a new style.
5. Adjust the Timers
We’re dealing with a lot more darkness in the winter instead of sunlight; you’ll want to adjust any timers you have on your outdoor landscaping lights, so you’re not wasting electricity and burning out your bulbs for no reason.
Many outdoor landscaping lights turn on at dusk, and they have settings to turn off after a few hours. You’ll have to adjust the number of hours it takes to turn off the lights to account for the added darkness in the evening.
Make sure you do this if it’s essential to keep your walk lit during the morning hours. If you get up early or you want to have the walk lit up for your local paperboy, you’ll want to change these settings and get them right.

6. Check for Exposed Wires
Outdoor string lights winter maintenance
continues with checking for exposed wires. When the ground thaws, you’ll notice that wires can work themselves up to the surface, which causes them to become exposed.
Exposed wiring is a problem, but it also grants an opportunity for you to check the wires for any fraying or damage. At this time, we don’t recommend doing this yourself unless you’re a trained professional. You can use a landscape lighting service to make the repairs and diagnose any additional problems.
Once you determine that your landscape lighting wires are good to survive another season, you can rebury them before the ground freezes. You’ll want to do this job early in November and December before the ground gets too hard from the deep freeze. This may change depending on where you live.
7. Look for Moisture
Moisture is a problem for a lot of electrical systems, and this applies to your winter landscape lighting
as well. Remove all the snow from your outdoor fixtures to prevent water from getting inside.
It’s important to choose fixtures that come with a lifetime warranty. Many companies will offer this, and they’ll have fine print regarding how it handles moisture. Make sure you follow all the instructions on the lifetime warranty, so you don’t do anything to void it. There will be plenty of maintenance instructions for you to follow.
While checking for moisture, make sure there are no easy ways for moisture to work their way in. Check for any cracks or openings in the globes.
8. Expand Your Walk
Now is also a great time for you to think about expanding your lighting and adding a few to your system. While it might make sense to have outdoor lighting along your walkway and even your driveway, other areas may benefit from a night light as well.
Many homeowners put lights in their landscaping for aesthetic appeal. You could also put them along a back patio, walkway, pool, shed, and more. There are no limits to what you can do with outdoor winter lights, so make the most of it and illuminate your entire yard.
9. Optimize Your Winter Lighting
Sometimes you don’t need to add more lights to your system, but you might need to move some around. Maybe the storms of spring and summer blew your lights around, and now you need to get them organized again.
At this time is when you can start to think about the overall appearance of your outdoor lighting and see if you want to change anything. Consider the function of the lights.
Regardless of what you choose, consider walking out to the road and taking a look at your property at night. Look at the traffic areas along your home and decide if you have enough light in these areas. If not, look for areas that might seem too bright because you may be able to recycle some lights from other areas to put in the portions that need more.
10. Remove Leaves
Leaves in yards are something that we all deal with when fall is coming to a close. You might want to wait until spring to clean them up, but if you can see them burying your light fixtures, so it’s time to get some work done.
You want your outdoor landscape lighting to shine as bright as possible, but that’s difficult when you can’t see them under the mountain of leaves. Take a walk around the property and diagnose any leave issues. If someone doesn’t realize there is a light fixture buried under a pile of leaves, they may trip and fall.
Remove all the leaves from your landscape lighting and dispose of them properly so you can light up your walkways and steps again!
The Importance of a Well Maintained Winter Landscape Lighting System
What’s the importance of landscape lights winter maintenance? You should make your landscape lighting a priority because it’s a matter of making your home safer and more beautiful.
Properly lit walkways help keep you and your family safe by pushing away vandals and intruders as well.
The last thing you want is for a visitor to your home to slip and fall on a dimly lit walkway in the dark. We spend a lot of time in the dark in the winter, and we all know that anything can happen, the last thing you should have to worry about is someone falling on your property.
Follow the tips outlined in this article, and your house will soon shine bright again!
The post 10 Maintenance Tips for Landscaping Lights During the Winter
appeared first on KG Landscape Management.
Ready to Start on Your Next Project?
Call us at (763) 568-7251 or visit our quote page.
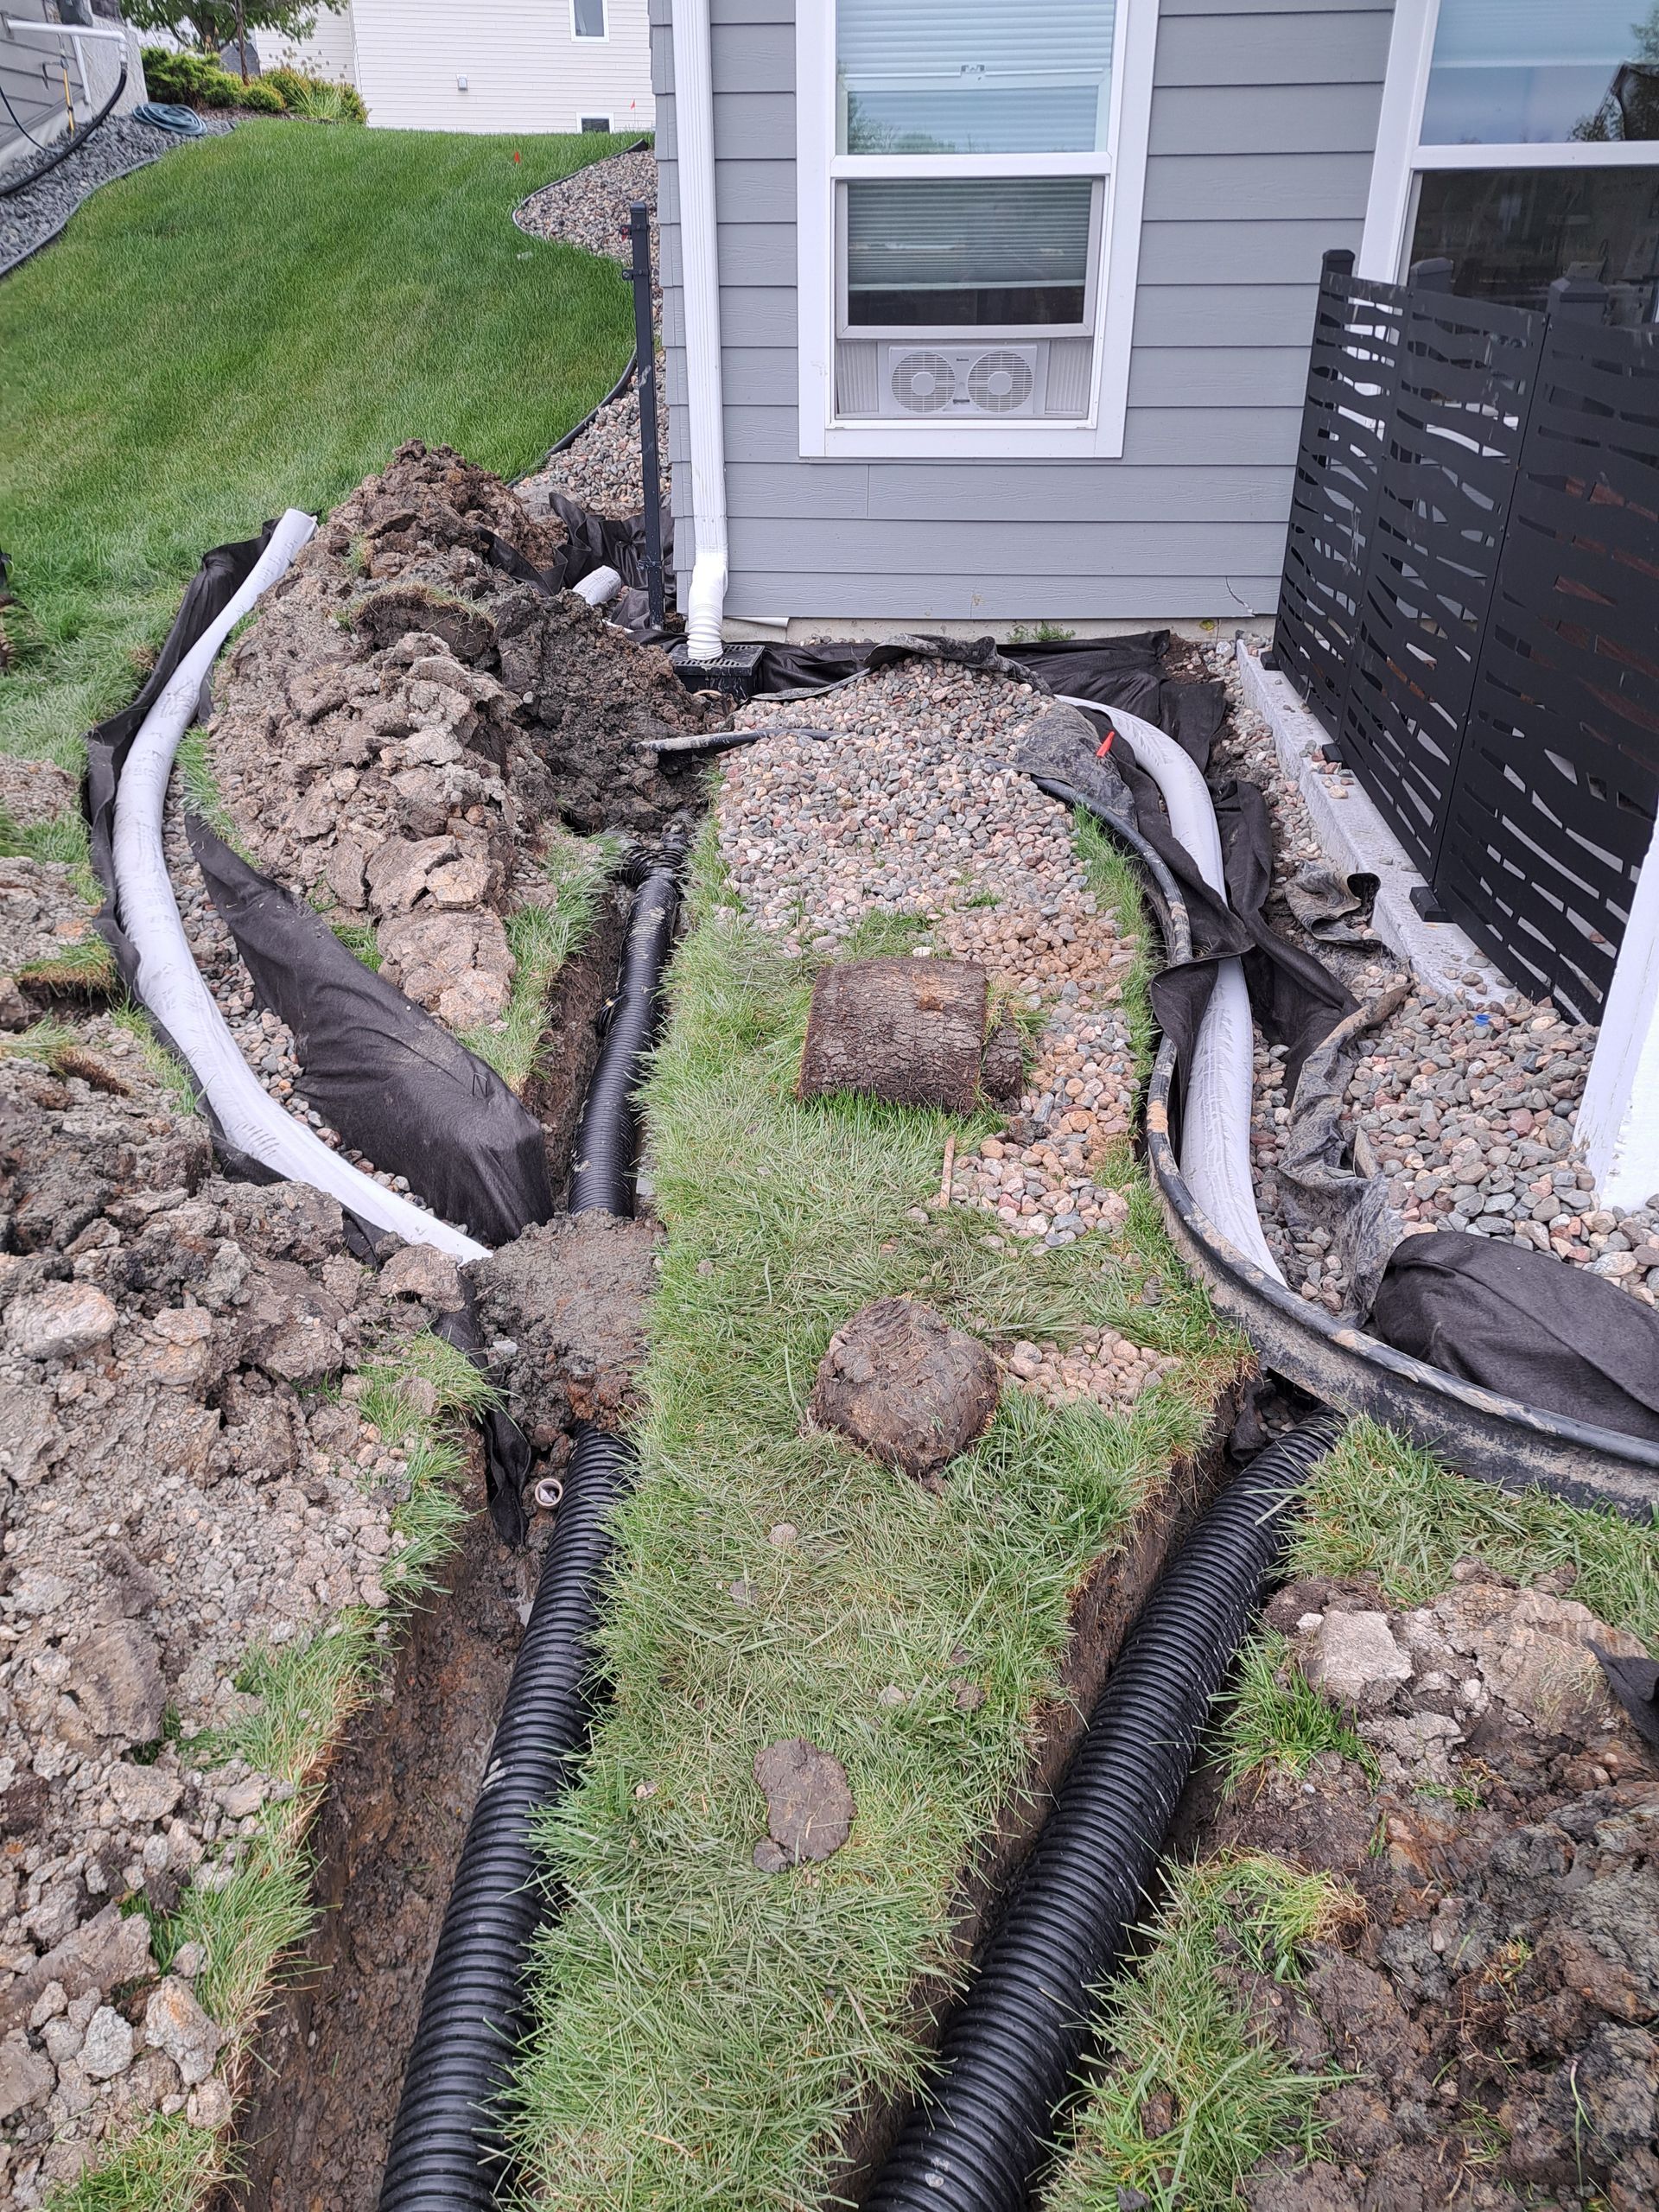
Where All That Water Is Actually Coming From Your backyard stays wet. You've noticed the soggy spots, the mud, maybe some frost heave damage to your patio or fence. You're thinking about French drains. But before you start digging trenches, look up. A huge amount of water hitting your yard isn't coming from rain falling on the lawn. It's coming from your roof. A moderate rainfall on a typical Plymouth home puts hundreds of gallons through your gutter system. Every bit of that water exits through your downspouts. Where it goes from there determines whether you have a drainage problem or not. Then there's your sump pump. Every time it kicks on, it's pushing water out of your basement and into your yard. On a wet property, that pump might run dozens of times a day. All that water has to go somewhere. If your downspouts dump water next to your foundation and your sump pump discharges into a side yard that drains toward your backyard, you're adding water to an already saturated situation. French drains alone might not be enough. You need to manage the sources. The Problem With Surface Discharge Most downspouts in Plymouth end with a splash block or a short extension that dumps water a few feet from the foundation. That's technically moving water away from the house, but not far enough.

