How to Design and Build a Cozy Outdoor Patio Fire Pit Area

Picture your patio becoming a comfy retreat that pulls you in, even on chilly evenings. That's where patio fire pits come in, and they're getting more popular. These fire pits serve a purpose beyond just providing warmth; they're invitations to enjoy your patio all year round. 


Making your outdoor patio fire pit area can be a fun project. In this guide, we'll show you how to create the perfect space for relaxing and having fun right in your backyard.


Let's talk about outdoor patio fire pits and how they make every season more fun.

Turning Your Outdoor Fire Area / Patio into a Cozy Space

Getting cozy by the fire pit or patio heater isn't just about staying warm. It's a chance to make a comfy spot where you can relax and have fun with your loved ones. Just add a few nice things, and your outdoor area will be the perfect place to hang out with family and friends.

A fire pit is sitting on a wooden deck next to a couch and chairs.

Choose the Right Location

First, you must pick the perfect spot for your outdoor fire pit area . Look for a flat, open space away from overhanging trees, buildings, or anything else that could catch fire. You'll want enough room for seating around of your cozy fire pit, so consider the size of your yard and how much space you have to work with.

Decide on the Type of Fire Pit


Consider some things when
picking out a patio fire pit . First, consider how much space you have. You don't desiret the fire pit to fill up all the space and make it seem too crowded.


There are various kinds of fire pits exist. Some use wood to make a fire, while some use propane or gas. Each kind has its advantages and disadvantages. 

So, consider space and fire type when picking a patio fire pit. And always make sure to use it safely according to the rules of where you live. 

Gather Your Materials

Once you've decided on the type of fire pit you want to build, it's time to gather your materials. For a built-in fire pit, you'll need things like bricks, concrete, gravel, and a metal fire ring. If you're going with a portable fire pit, you'll just need to purchase the pit itself along with some firewood or propane.

Prepare the Site

Before you start building, you must prepare the site for fire pit. Building a built-in fire pit will involve:
  • Digging a hole for the pit.
  • Leveling the ground.
  • Possibly adding a layer of gravel for drainage .

If you're going with a portable fire pit, you'll just need to clear the area of any debris and make sure it's on a stable surface.

Build Your Fire Pit

Now comes the fun part – building a fire pit. If you're building a built-in fire pit , start by laying down the first layer of bricks or stones in a circle, leaving space for your cozy fire pit insert. 
Continue adding layers until a fire pit is the desired height, then fill in any gaps with mortar. Finally, place the metal fire ring inside the pit to contain the flames.

If you're using a
portable fire pit , simply follow the manufacturer's instructions for assembly. Once it's put together, place it in the center of your patio area, and you're ready to go.
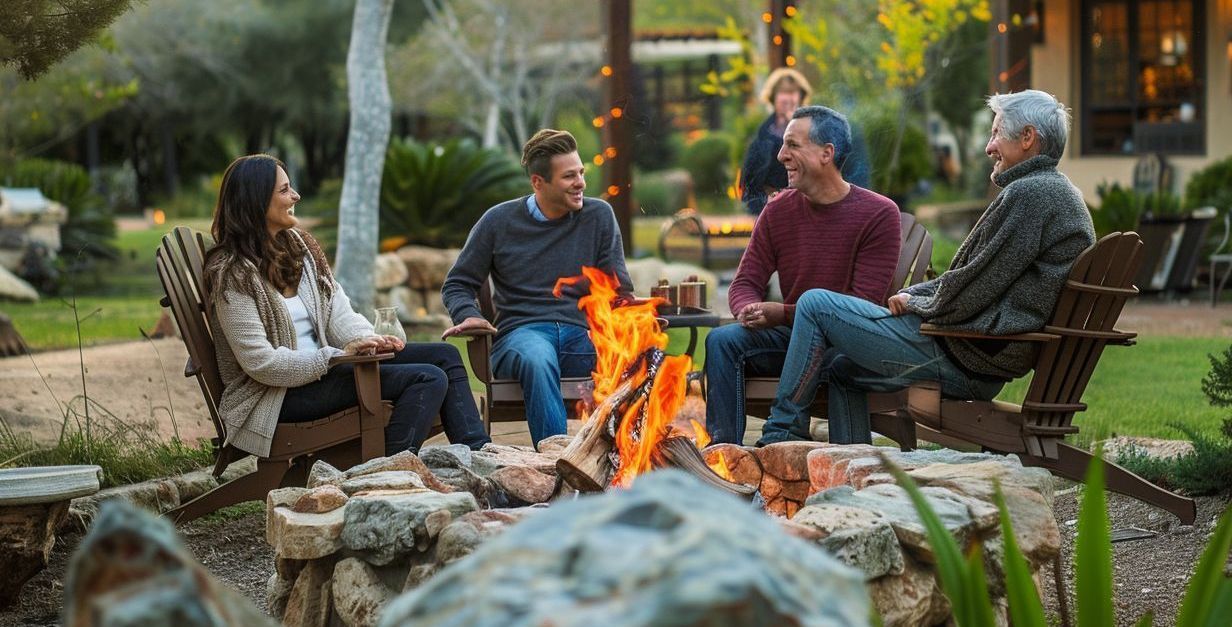
Comfortable Seating

Make sure your guests have a cozy place to relax. Choose comfortable seating with plush cushions and durable materials. Arrange the seats throughout to your comfortable fire pit area to encourage conversation and connection. Don't forget to include throws or blankets for extra warmth on cooler nights.

Lighting

Set the mood with soft lighting surrounding the fire pit area. Hang up string lights lanterns, or light some candles to instantly make it feel warm and welcoming.

There is a fire pit in the middle of the patio.

Stylish Fire Pit Lounge with Natural Touches

For a stylish fire pit lounge:

  • Bring in natural elements to enhance your backyard design.
  • Add plants and flowers around the seating area for a lively and fresh feel.
  • Choose raw materials such as stone or wood for the fire pit and seating to create a warm and inviting look.
  • Consider including a water feature as a central point to create a tranquil and soothing ambiance.


Cozy Additions


Enhance the fire pit and experience with cozy accessories like firewood baskets, fire starters, and roasting sticks. These small touches can make your time by the fire even more enjoyable.


Outdoor Rugs


Outdoor rugs make the space feel cozier and more defined. They add color and texture and help delineate the area around of the fire pit.


Outdoor Kitchen


For those feeling adventurous, consider adding an outdoor kitchen to fire pit area. A simple setup with a grill, sink, and storage can elevate your outdoor gatherings, allowing you to cook and enjoy meals surrounded by nature.


Music


Don't forget the tunes! Whether playing music through a portable speaker or strumming some acoustic tunes, adding music to a fire pit area can enhance the ambiance and turn it into a true gathering spot.


Safety First


Last but certainly not least, it's important to prioritize safety when using your outdoor fire pit area. Make sure to keep a fire extinguisher nearby in case of emergencies, and never leave the fire unattended. 

Always fully extinguish the fire before leaving the area or going to bed, and never use flammable liquids to start or revive the fire.

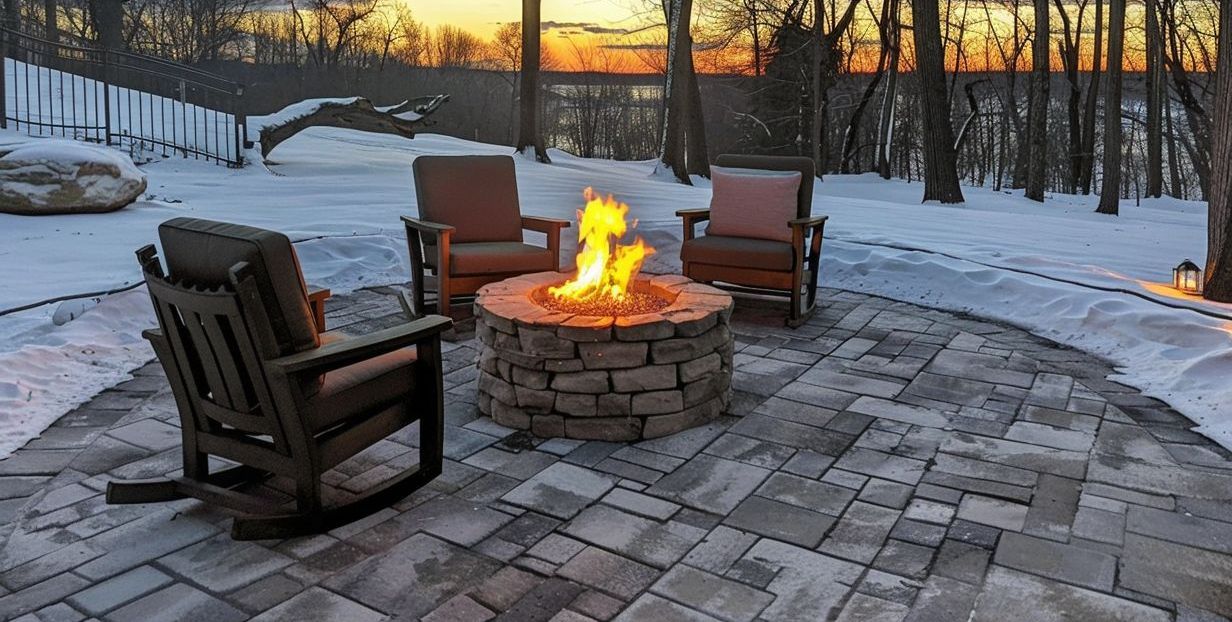
Maintaining Your Fire Pit Safe and Enjoyable All Year Round

Transforming Your Patio into a Cozy Haven


Putting a fire pit on your patio is like giving a touch of magic. This keeps you warm and makes outdoor space extra cozy. Imagine yourself enjoying peaceful evenings, making memories into your outdoor oasis, and sharing stories.


It's time to make that leap and create your peaceful retreat today. So, we will carefully design your new patio space and show you the best layout options. Getting started is easy; just give us a call or
send a quote request


At KG Landscape, we're committed improving your outdoor enjoyment with top-quality products, services, and even accessories. Reach out us at (763) 568-7251 or
browse our website for more information. Begin turning your patio into a serene retreat with your very own cozy fire pit.

Ready to Start on Your Next Project?

Call us at (763) 568-7251 or visit our quote page.

By Kent . October 16, 2025
Plymouth’s clay soil causes soggy lawns, sinking patios, and constant sump pump issues. Learn how smart drainage design fixes it for good.
By Kent . October 14, 2025
Minnetonka snow removal done right means safety, efficiency, and property protection—not just plowing. Learn how true winter care works.
By Kent . October 11, 2025
Plymouth drainage problems? Fix soggy clay soil and prevent foundation and patio damage with smart drain tile, grading, and discharge solutions.
By Kent . October 5, 2025
Edina lawn fertilization: seasonal strategies for lasting color and health. Expert insights on timing, topdressing, and soil care.
By Kent . October 2, 2025
Design a Minnetonka outdoor kitchen built for all seasons — cedar, stone, and smart drainage make year-round living effortless.
By Kent . October 1, 2025
Medina lawn experts explain how healthy soil—not chemicals—creates lasting weed control through aeration, overseeding, and topdressing.
By Kent . October 20, 2025
Medina drainage experts explain how French drains and drain tile systems fix clay soil water issues and prevent muddy lawns and shifting patios.
By Kent . September 29, 2025
Edina patio and pool drainage: protect your investment with smart design and precision installation that keeps surfaces beautiful, safe, and stable year-round.
By Kent . September 28, 2025
When Pergolas Don’t Last, There’s Always a Reason After nearly two decades of building outdoor spaces across Medina, I’ve seen what happens when pergolas aren’t designed for Minnesota’s conditions. You can spot them a mile away—posts that lean, beams that twist, and concrete pads that have heaved out of level after just a couple of winters. It’s not because homeowners cut corners intentionally. It’s usually because whoever built it didn’t account for what our climate really does to structures that aren’t anchored right. Medina’s heavy clay soil doesn’t drain well. It holds moisture, freezes solid, and then expands like a hydraulic press pushing on everything above it. When pergolas are set on surface-level post bases, that pressure has nowhere to go but up—and the whole thing moves. Even small shifts can cause joints to separate, wood to crack, and hardware to loosen. That’s how a $15,000 structure starts looking tired after a few years instead of standing straight for decades. The truth is, pergolas here aren’t just about shade or looks. They’re about structure, drainage, and how every piece ties into the patio beneath it. A pergola that stands tall through Minnesota winters is built on the same principles as a good foundation—it’s only as strong as what’s underneath it. If you live in Medina and want to enjoy your backyard without worrying about your investment warping or sagging, start with design that respects the environment it’s built in. That means thinking beyond lumber and stain colors. It means understanding soil movement, water management, and the importance of integrating your pergola with the patio below it.
By Kent . September 27, 2025
Solutions for Properties in Minnetonka You can always tell a Minnetonka yard that’s fighting its slope. Water doesn’t lie, it finds the weak spots every time. I’ve walked plenty of properties where a backyard starts beautiful in June, but by September, the patio is heaving, the grass near the pool looks like a marsh, and the homeowner is wondering how it got so bad so fast. The truth is, when you’re dealing with rolling terrain and heavy clay soils like we have around Minnetonka, you can’t just move dirt and hope gravity behaves. You need a plan that manages water from the surface all the way down through the subsoil. This is what I’ll walk you through here. You’ll see what actually causes drainage issues on sloped properties, how poor planning leads to cracked patios and shifting pool decks, and the smart drainage systems that can stop those problems for good. Whether you live near Lake Minnetonka or up in the higher ridges closer to Deephaven or Woodland, understanding how your yard sheds water is the difference between a property that lasts and one that’s constantly under repair. The Real Challenge of Sloped Minnetonka Yards Minnetonka is known for its hills, lakefront properties, and mature trees, but all that beauty comes with a set of challenges below the surface. Most of the soil here is dense clay. It holds water like a sponge and drains slowly, which means after every heavy rain, that water looks for a way downhill. If it doesn’t have a proper outlet, it ends up collecting right where you don’t want it, like along your patio, at the base of a retaining wall, or near your pool deck. I see this every season: homeowners trying to solve slope problems with a quick regrade, a layer of rock, or a simple surface drain. Those things might help for a while, but they don’t address what’s really happening underground. Clay soil doesn’t just get wet—it becomes saturated, expanding and contracting with every freeze-thaw cycle. When that happens under a patio or wall, it doesn’t matter how well-built the surface looks. The ground will move, and that movement cracks stone, shifts pavers, and slowly tears apart everything on top. The other challenge with sloped lots is how water interacts with gravity. It accelerates downhill, gaining momentum as it goes. When it hits a flat area like a patio, the water loses speed but not volume, pooling instead of flowing. That’s why I tell clients that “flat spots” on a sloped property are both an opportunity and a responsibility. They’re the best spaces to create usable outdoor areas, but they have to be engineered to handle water movement. I’ve worked on plenty of Minnetonka yards where the backyard has a beautiful view but terrible grading. You can have a perfect slope on paper, but if it directs water toward your house or creates a bowl effect between structures, you’ll end up with soggy soil and standing puddles that never dry. The goal is to move water off and away while keeping the surface level enough for comfort and usability. It’s a fine balance, but when it’s done right, it completely transforms how a property functions.