
5 Drainage Techniques for Sloped Landscaping
Sloped landscapes have natural advantages for landscape drainage, but they aren’t perfect just by existing. Sometimes, sloping areas are prone to lingering water and other issues. Here are five of the best drainage techniques for sloped areas:
#1: Channel Drains
Channel drains, also known as a trench drain system, are an excellent choice for sloped landscaping if you put them at the bottom of hills, where most rainwater collects. They’re also narrow and easy to disguise with plants or similar groundcovers, so you don’t need to worry about the drain covers ruining the aesthetics of your yard.
These drains are useful because, without them, water may pool at the bottom of sloped areas. Pooling water is a massive problem if you have grass, flowers, or walkways at the slope’s bottom. Channel drains are relatively easy to install and can reroute water to a proper draining area.
Heavily-sloped channel drains aren’t as common, but they may work in some environments if you need to reroute water that comes in from somewhere else on your property. Don’t forget to make the drains big enough to handle significant amounts of overflow.
#2: French Drains
The classic French drain is a great alternative to channel drains when you want to have a layer of grass or moss on top of your yard drainage systems. French drains have a drainage pipe set in a gravel box, covered in unique fabric to prevent dirt and silt from washing into the drain.
As the water level rises when it rains, the water flows into the pipe and towards the exit. While French drain mistakes can stop these from working correctly, most French drains are hard to get wrong in sloped environments as long as you put them in the right spot.
Like channel drains, French drains work best when you place them in areas where water is most likely to collect. This includes the bottom of the sloped regions, but it can also include the tops or, rarely, side areas as long as you have a proper drainage setup.
Mixing French drains with vertical drains when you have several levels to the slope can be beneficial. This setup makes it much easier to keep the entire slope dry instead of letting water pile up and pressure specific areas.
For more on this subject, see our guide to building French drains correctly.
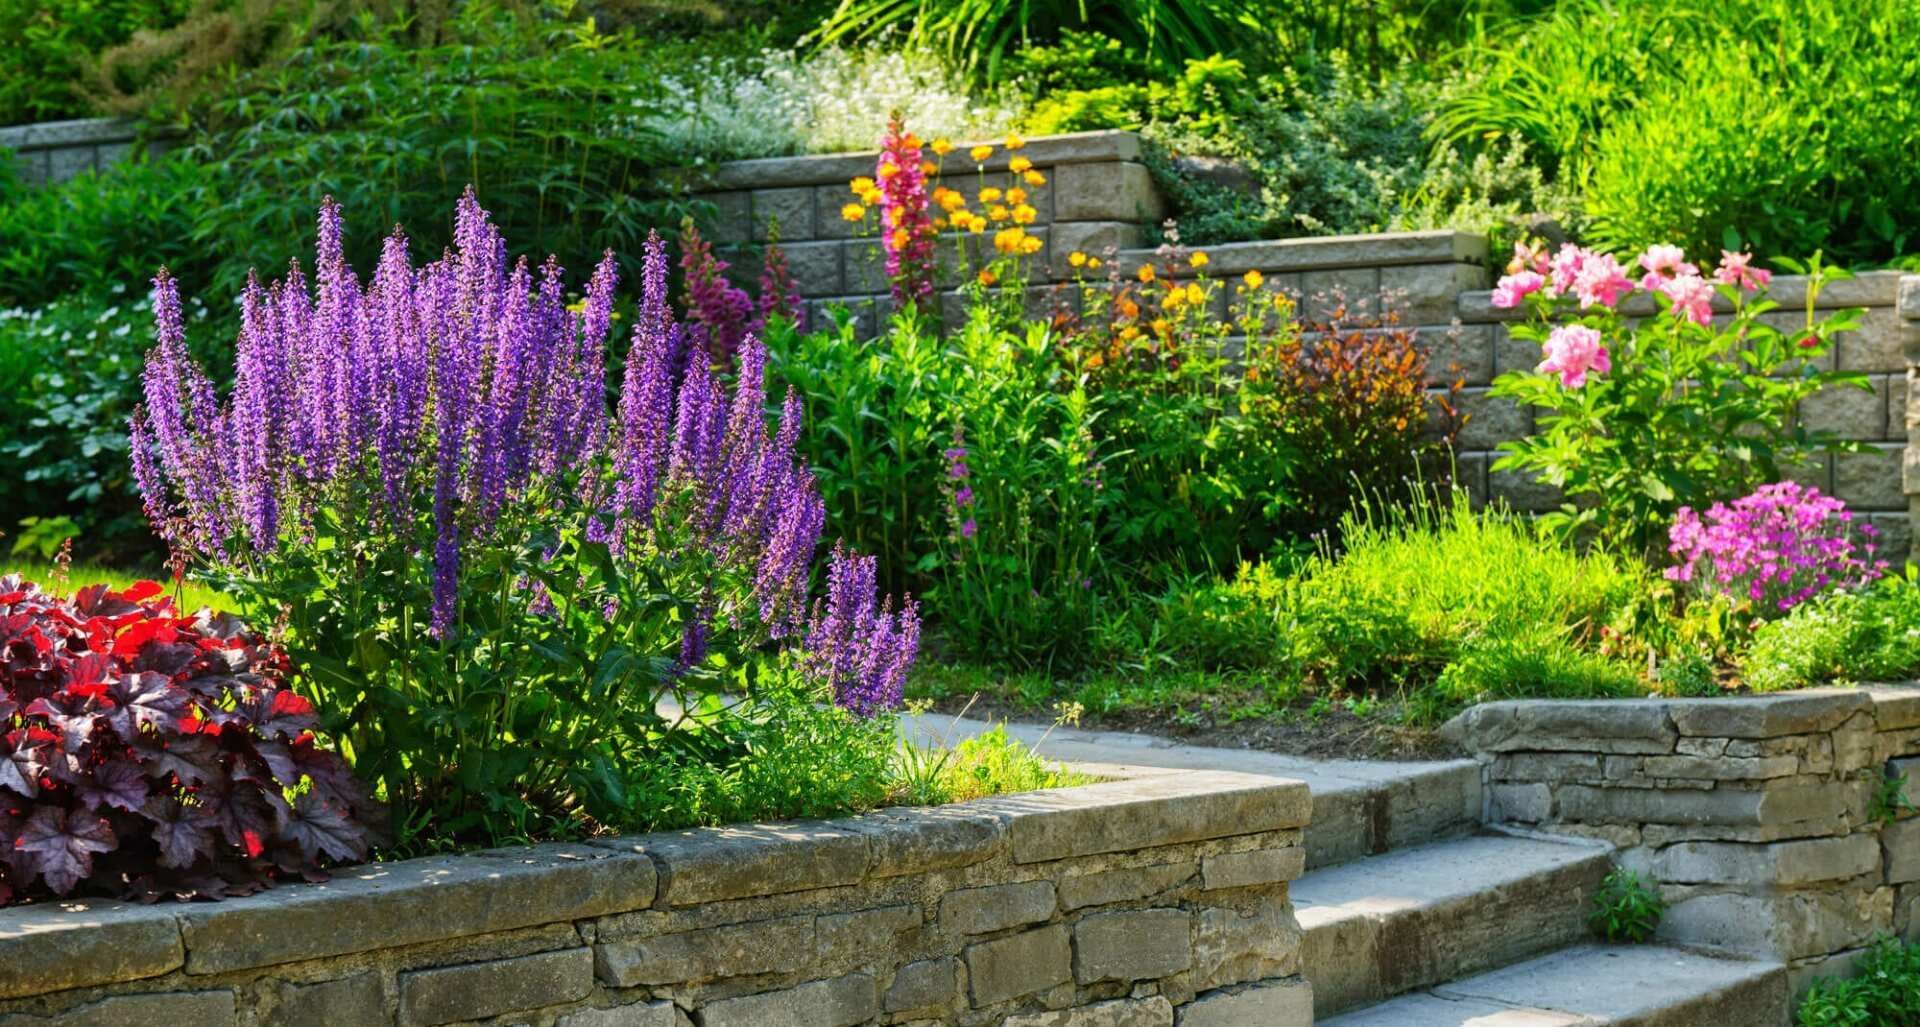
#3: Retaining Walls
Retaining walls are among the most effective types of drainage when you’re making slopes. Rather than holding water back, retaining walls encourage drainage by creating large gaps that water can flow straight through to continue down through your landscaping.
Retaining walls also serve as natural vertical drains. They only need a few inches of gravel or similar material to let water drop straight down into a pipe or another outlet. Many people use retaining walls in conjunction with channel or French drains to keep water moving towards its final outlet.
Here are some other things to consider if you’re thinking about building a retaining wall.
For more on how retaining walls work with sloped landscaping, see this guide.
#4: Dry Wells
Dry wells aren’t necessary for most sloped areas because you’re already rerouting water. Still, they are useful if you expect to see vast amounts of water or if you want to manage your water more effectively.
Dry wells are large storage tanks, often holding around 50 gallons that you can place anywhere in your landscaped area that water tends to collect. Dry well placement isn’t limited to the sides or bottom of the slopes, either. Depending on your terrain, dry wells may be useful even at the top of the slope.
The real trick with dry wells is deciding how you want to drain the wells. There are two practical techniques for this:
If you really want to get creative, you can use dry wells and pop-up emitters to create water fixtures that only exist when it’s raining and water is coming out. That’s more complicated than most people want, but it just goes to show how much you can do if you get a little clever with your drainage techniques.
Remember: Every yard is different, and factors like the kind of soil you have, your budget, and what you envision for the final result all affect which types of drainage make sense for your area.
We strongly recommend hiring professionals
for installing retaining walls or dry wells.
#5: Sump Pumps
Like dry wells, sump pumps aren’t our top choice among drainage techniques for most sloped landscaping. The keyword here is “most.” Retaining walls and the occasional channel or French drain suffice for most areas, but if you need to move a lot of water in a hurry, sump pumps are the top choice. Here’s how they work.
These pumps go in the lowest area of your landscaping, usually below all slopes or at the bottom of a hill. The larger your slopes, the more water you’ll collect at the bottom, and the harder it will be for regular channels to take care of things. That’s where sump pumps come in.
Rather than spreading water out, sump pumps work best when you concentrate all the water in your landscaped area and push it all towards the pump. Once the water reaches the pump, it gets pushed out and towards a proper drainage pipe or some other water disposal system.
Alternatively, sump pumps may be a good choice if your building is above your landscaped area. This layout lets the pumps move water away from the structure’s foundation as quickly as possible and pushing it towards your other drains.
Don’t forget to check your sump pump
at least once a year. Sump pumps do fail over time, so make sure you install them in an accessible area.
Why Does This Matter So Much?
Landscapes do not exist in a vacuum. Getting rid of excess water is essential for maintaining your landscaping. You can’t do that effectively without considering where all that water is coming from. Water can come from heavy rainfall, areas higher on a slope than you, or even from pumps and pipes on other properties.
Like we said above, every landscape is different. That’s why many people use several different types of drainage techniques for sloped landscaping, rather than just putting in small drains or channels where water seems to pool the most.
The fundamental principle to keep in mind is that the more water reaches an area, the more drainage you need. That could mean bigger pipes, more channels, extra pumps, or some combination of other steps.
If you’re still uncertain about how to drain your sloped landscaping adequately, don’t hesitate to contact an experienced landscaping company
like KG Landscape to assess your property and make a plan based on your needs.
The post 5 Drainage Techniques for Sloped Landscaping
appeared first on KG Landscape Management.
Ready to Start on Your Next Project?
Call us at (763) 568-7251 or visit our quote page.

The legendary architect Louis Sullivan coined a phrase that has driven architecture and design ever since: "form follows function." While aesthetics are critical to buildings and landscapes alike, that physical beauty must always remain secondary to the fundamentals of good design. In Shoreview, Minnesota, just outside St. Paul , we encountered a landscape where, unfortunately, function followed form. Here, the realities and principles of effective drainage were downstream of their original builder's aesthetic choices. That meant water from snowmelt and rainfall was streaming into parts of the lawn where it wasn't meant to be. The standing water that had been allowed to collect in the back and side yards was putting a considerable amount of the property out of play. In order to reclaim usable space and rethink the way the land handled water, this Shoreview homeowner entrusted KG Landscape with identifying key issues, presenting potential solutions, and doing the necessary work the client decided upon to restore their lawn.

On the shores of Lake Minnetonka, perhaps the most famous of Minnesota's 10,000 lakes, an Orono, Minnesota homeowner was struggling with a back yard that was becoming more marsh than yard. The yard was a scenic one. The back porch opened up to the top of a small hill, which rolled down toward the lakefront and the boathouse. This flat space between the hill and the water would be ideal for backyard barbecues, some low-stakes games of bocce and badminton, or simply a spot to lay down a towel and get some summer reading done. Instead, this area was too waterlogged to enjoy. The runoff from the hilltop combined with unfavorable soil composition were limiting the use of the yard, closing off space while even diminishing the quality of the turf. How would this homeowner be able to reclaim this unusable land without disrupting the Lake Minnetonka shoreline that made the property so attractive? To find a solution, they turned to KG Landscape.

Can you use compost as lawn fertilizer in Minnesota? Learn how compost feeds turf, how to apply it, and where it fits. Get a free quote.

Organic weed control for Minnesota lawns: what works, what doesn't, and how to manage weeds without harsh chemicals. Get a quote.

Keep your lawn and your pets safe. Pet-safe lawn care tips for Minnesota yards, from products to timing. Get a free quote.

Looking for the best organic lawn fertilizer in Minnesota? See top options, how they feed your turf, and what KG uses. Get a quote.

Is compost a fertilizer? Learn what compost does for your Minnesota lawn, how it differs from fertilizer, and when to use it. Get a quote.

Compost feeds the soil, fertilizer feeds the grass. Learn which your Minnesota lawn needs, when to use each, and how to apply both. Get a quote.

Eco-friendly lawn care tips for Twin Cities yards: cut chemicals, save water, and build healthy soil naturally. Get a free quote.

Simple, proven lawn care tips for Minnesota yards: mowing, watering, feeding, and building healthy soil that lasts. Get a free quote.