If you’re known to spend long days outdoors, investing in a beautiful landscape design is an excellent idea. Many unique tactics can transform a drab lawn into a stunning backyard escape, but incorporating bridges into your plan is one of the best ways to boost curb appeal. So let’s dive into the step-by-step process of implementing a bridge in your existing landscape design (or starting entirely from scratch):
1. Decision Time: DIY Project or Hire the Pros?
First, you need to determine whether you want to hire a professional landscaping service to get started or simply complete the project yourself. Some people are confident enough in their construction skills to take on a do-it-yourself task, while others are less inclined to DIY. If you’re a member of the latter group, don’t worry; you can get expert services, including bridge construction, from a landscape design company like KG Landscape.
For people privy to DIY projects, there are a few important things to keep in mind. Although building a bridge yourself might cut initial costs, margins for error by inexperienced builders can ultimately make it more expensive.
2. Selecting a Bridge Design
Once you decide to DIY your bridge installation or hire professionals, you can put more thought into the design. Consider different bridge styles and wood types to find something that suits your needs and aesthetic.
Store-Bought vs. Hand-Constructed Bridges
A quick online search for landscaping bridges for sale will lead you to a vast selection of pre-fabricated pieces perfect for the focal point of your design. Alternatively, you can always construct the bridge yourself or take advantage of skilled laborers from your local landscaping company.
Choose Your Wood Wisely
Your bridge material selection should take a bit more careful consideration. Because the structure will spend its entire lifespan outdoors, you want to select wood with the greatest longevity. Most store-bought bridges are made from composite or treated materials that won’t weather or get infested with pests. In contrast, hand-made bridges are typically built using natural, untreated lumber that is then stained. Western red cedar, redwood, and cypress woods are top choices (and cost-effective, too), but other popular options include:
Consulting with an expert is essential to determine which wood type will be most durable for your backyard bridge. This can depend on the local climate, temperatures, precipitation levels, and common weather conditions in the area.
3. Getting Drainage Done Right
Achieving the proper outdoor drainage is one of the most important pieces of the puzzle in this process. You don’t want water features to flood and inundate your yard with stagnant water when it rains. This can cause costly and unattractive erosion or water damage. Utilize a knowledgeable landscaping partner instead to inspect the current slope and drainage patterns and make any necessary improvements before incorporating a bridge into your landscape design.
4. Installing Water Features
After assessing your drainage needs and ensuring everything runs smoothly, you can start installing water features to flow under the bridge. If you’re lucky enough to live on a property with natural water bodies like creeks, brooks, and ponds, you don’t have to worry about this part of the landscaping process. But if you’re like the vast majority of homeowners, consider incorporating additional water elements to enhance your bridge design, such as:
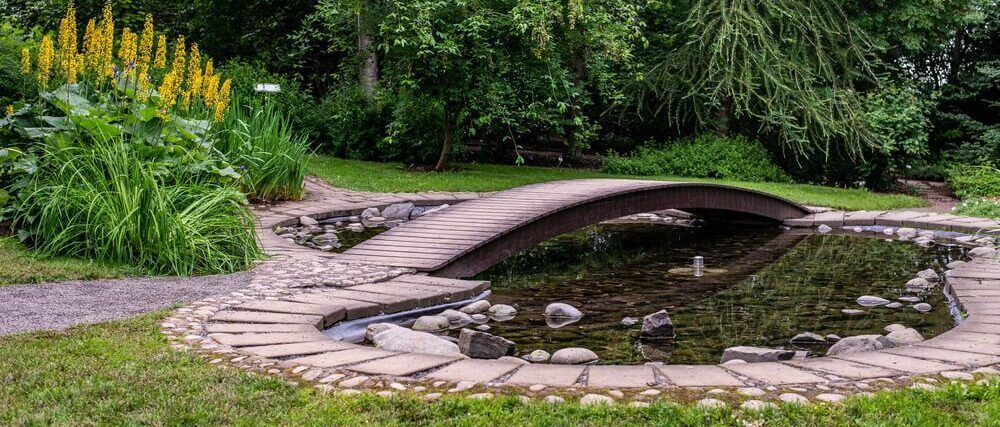
Your backyard bridge will be installed across a body of water like a small pond or creek bed as expected. While the tranquil waters travel under the bridge, other features like fountains add more movement adjacent to the primary focal point. Serene koi ponds or vibrant pools piled high with lily pads are other fun ways to add to the flow of your full landscape design.
5. Settling on an Aesthetic
Everyone has an individual style in clothing and home decor, so why should outdoor landscaping be any different? Incorporating a bridge into a landscape design gives you abundant opportunities to truly showcase your favorite aesthetic. Get inspired by some great landscaping ideas below:
English Tea Garden
When you imagine an English tea garden, you’re probably transported to lush, green gardens with perfectly manicured topiary trees or shrubs and winding stone walkways. Well, that’s exactly what you can include in your own English tea garden design to get the dramatic and romantic aesthetic you desire.
Japanese Zen Garden
A Japanese zen garden is another landscaping trend that lends itself to peace, serenity, and tranquility at home. If you love to meditate, this is an excellent design option. Zen gardens aim to imitate the natural splendor of the Japanese seaside and utilize specific elements to mimic things like forests, mountains, and ocean water, such as:
Ensure you give your newly installed bridge a touch of typical Japanese architecture and landscaping if you enjoy the zen garden aesthetic. Utilize cherry blossom trees or other common plant species around your bridge and paint it with specific colors such as black, red, and gold to achieve an authentic Japanese flair.
Tropical Retreat
Tropical or semi-tropical landscape designs are another excellent choice for people who prefer ocean-front vacations. Include vibrant tropical plant species, natural stone pathways, or stunning waterfalls to simulate a fantastic tropical rainforest trek across the bridge.
Forest Oasis
Many outdoor-oriented folks go with a forest oasis option for their design aesthetic. Utilize tall trees or shrubs and natural stones or boulders to bring the bustling forest environment to your backyard.
Native Landscape
Another landscaping trend that’s booming in popularity these days is native prairie. Planting native wildflower species in your landscape has
tons of environmental benefits. Plus, it looks beautiful and draws exciting creatures like butterflies and songbirds toward your property.
6. Incorporating Landscape Elements
Now that you understand the exact design aesthetic you’re going for, it’s time for you to incorporate each landscape element into your yard. Using the bridge as your primary landscape element, implement other features to create a fantastic and visually stunning design. Explore a few examples of popular landscaping elements below to spark inspiration for your own property:
Here comes the fun part: picking out the plants, shrubs, and flowers you want to feature in your landscape design. Do your research and utilize resources like
this plant hardiness zone map
from the USDA to determine which species will successfully thrive in your local climate.
Stone Pathways
Of course, you can’t cross over a bridge without the proper pathways to and from each side. Select various colors, stampings, shapes, and styles when installing a stone walkway to the new bridge on your property. Don’t forget to include your favorite plantings to accompany your pathway design.
Arbors & Trellises
Another fantastic landscape element that helps enhance an English tea garden aesthetic (as well as others) is an arbor or trellis. You can cultivate climbing vines and vibrant flowers to encompass an arbor or trellis’ frame at the entrances and exits of your bridge structure.
Landscape Lighting
Lastly, consider landscape lighting to complete your design. Utilize spotlights to illuminate your bridge or install outdoor LED lighting strips across (a la movie theaters and airplane aisles) for both style and safety. You can also wrap store-bought string lights around the bridge’s railings and banisters for a fun approach to outdoor lighting.
7. Enjoying Your Beautiful New Bridge
With your bridge wholly incorporated into your landscape design, you’re well on your way to enjoying a beautiful escape just a few feet away from your back door. All you need to do now is
keep up with annual landscape maintenance to make sure your bridge and the surrounding plantings stay beautiful all year long.
Whether you’re sipping a glass of wine alone after work on a weekday evening or sharing your outdoor space with a slew of weekend guests, you can expect your backyard bridge and landscaping to look their best with the right level of care and attention.
Contact KG Landscape to schedule regular maintenance or make the next move to start your backyard bridge installation today.